Showing posts with label Italian. Show all posts

Sunday, November 6, 2011

Baked Green Eggs

I have a real love of vegetables. Their various shapes, colors and textures are as beautiful to me as a bouquet of flowers.  Eating them is simply a bonus!  As a girl who grew up in the heart of Bar-B-Que country, Kansas City, meat often took the center stage at my family's dinner table. To this day I still appreciate a thick n' juicy pork chop and hearty slab of ribs, however, why not make meat take a backseat to vegetables, nuts, eggs, and cheese every once in a while?  From my observations, the term "vegetarian" often scares people away from choosing such recipes out of fear that all meatless dishes are bland and unsatisfying. Plus, let's be honest, no one delights in peeling carrots or washing heads of lettuce... 

However, I have a marvelous little book that sits proudly on my cookbook shelf next to larger, meatier neighbors:

By Anna Thomas, Copyright 1972
ISBN 0-394-71784-8

I purchased this cookbook from a garage sale for $1 while I was an undergrad in college. The author supports ideas of sustainable gardening, meal sharing, and most importantly, enjoyment of food as a way of eating.  This little book, as "vegetarian" as it is, breaks down prejudices about meatless eating. Vegetables can be scrumptious, filling, and embraced at the dinner table as the main course.  


For example, my husband and I loved this creamed-eggs dinner, which I am calling "baked green eggs" since it contains a decent amount of leafy greens. This is so simple and satisfying!  I made it a modern twist to the book's, Eggs Florentine recipe.  See my recipes below. 

Sauteed greens and mushrooms are the casserole base.

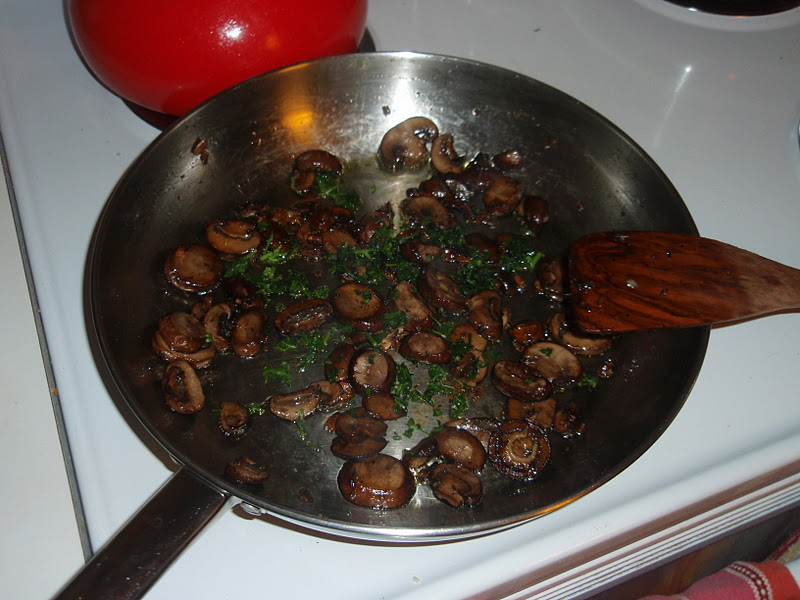
First, sauté your greens of choice (spinach or even mixed salad greens) in some olive oil. I added leftover mushrooms cooked with Italian herbs from a different recipe. You can basically sauté any vegetables you think might be nice. Next time I will probably add thinly sliced yellow onions. Your veggies, mostly green in color, act as the foundation to this dish.

Add eggs and cheese!

The second step is to create little craters using a spoon to nest four raw eggs into. As you can see, I didn't really follow the rules. I cracked five in there!  Also, any strong cheese will work instead of parmesan. I, personally, adore a block of quality aged, hard parmesan that I grate as needed.

The magic sauce... Béchamel!

Pour your pre-made Bechamel sauce all over those cute little eggs and your casserole is ready for the oven!  In just 20 minutes, the sauce will solidify and create a slight crust at the edges of the pan. As for the eggs, the whites will be solid but the yolks will ooze out as a delicate gravy when your fork slices through its layers. I recommend serving a loaf of warm, nutty bread as a spongy utensil to help soak up the eggs and cream.  As a side, I served additional fresh mixed greens topped with Italian-inspired Marinated White Beans. 


Cheers to the meatless meek! 

Baked Green Eggs 
Adapted from "The Vegetarian Epicure"
Serves 4

1 lb. fresh spinach or mixed greens
1/2 cup sauteed mushrooms (optional)
3 Tbsp. olive oil
4 eggs
Salt and pepper to taste
1 Tbsp. butter
4 Tbsp. grated parmesan
1 cup Béchamel Sauce (below)

Wash your greens, roll in a tea towel and gently shake to eliminate most of the water. Heat the olive oil in a large frying pan over low-medium heat. Add the green leaves, cover, and allow to cook for 5 minutes to wilt the leaves. Remove cover and stir so that all of the leaves are covered in the hot oil. Cook about 2 minutes more, season with salt and pepper and remove from heat. If you are adding mushrooms (optional) sauté the mushrooms before adding the greens to the pan. 

Lightly spray or butter a deep baking dish. Arrange the hot greens and mushrooms (optional), a little higher at the edges than in the middle. Using a spoon, create 4 small hollows within the greens. Distribute the 1 Tbsp. butter between the 4 hollows. Then, carefully break 1 egg into each hollow (4 total). Sprinkle the grated parmesan evenly over the eggs and greens, finishing with pouring the Béchamel Sauce over everything.

Bake in a preheated 350 degrees F oven for 15-20 minutes. Serve hot!


Green Egg Casserole

Basic Béchamel Sauce
Adapted from "The Vegetarian Epicure"
Makes about 1 cup

1 1/4 cup milk (whole is best)
1 1/2 Tbsp. butter
1 1/2 Tbsp. flour
1/4 onion (white or yellow), minced
1 teaspoon peppercorns (cracked or whole)
1 teaspoon dried thyme
1/2 dried bay leaf
Salt to taste
Pinch of ground nutmeg

In a small sauce pan, heat the butter until bubbly. Add the finely chopped onion and let cook over low heat for about 5 minutes. Stir in the flour and continue cooking a few minutes more. Then, add milk bit by bit and stir with a whisk while you do. The sauce will begin to thicken after a few minutes. Add the spices and let cook over low heat for about 15 minutes. Strain through a sieve. Once prepared, try to use within a few days, and if possible, immediately. Note: This sauce has many variations by substituting or adding different spices and cheeses. 


Bechamel Sauce

Marinated White Beans
Adapted from "The Vegetarian Epicure"
Serves 8

1 cup white beans (Cannellini, Great Northern, or Navy)
1/2 cup olive oil
1 bay leaf
2 whole cloves garlic
1 Tbsp. salt

Marinade:
1/2 cup olive oil
1/2 cup white wine vinegar
4 Tbsp. chopped fresh parsley (or 1 Tbsp. dried)
1/2 teaspoon dried crushed oregano
1/2 teaspoon dried crushed basil
1/2 teaspoon dried crushed tarragon
Salt and pepper to taste

Wash the beans and soak them overnight (or using soaking directions on the bag). Combine the beans in a pot of water, along with olive oil, garlic cloves, bay leaf, and salt. Bring to a boil and then turn heat down to a low simmer until they are tender but not mushy (about 1 1/2 to 2 hrs). While beans are cooking, prepare the marinade by whisking together all of the marinade ingredients in a medium sized mixing bowl. Once the beans are the desired tenderness, drain the beans and remove the bay leaf and garlic cloves. Mix the beans into the marinade, cover, and refrigerate overnight (at least 12 hrs).  Serve cold over salad or as a side dish to an Italian pasta dish.

Marinated Italian White Beans

Sunday, October 30, 2011

Italy Part 31: Mission Complete

Something magical happened this week:  Monday I went for a pleasant jog in 80 degree weather - sun screen, shorts and all. Then, unexpectedly, Tuesday evening I was slipping and shivering out to my car after knocking off work. To my amazement, the sidewalks were covered with wet snow. Tree branches were gracefully stretching down to touch their roots, balancing heavy white masses. Dogs on leashes were happily sniffing their covered territory with white noses.  I guess I should start checking the weather before leaving the house in the morning! 

Cheesman Park after Denver's first snow fall of 2011.
Radishes made for fancy snowman buttons.

Second to snow, another magical thing happened this week: I completed my Italian cooking challenge!  Can you hear the confetti poppers and whistles?!  It took a total of four months to make 75 recipes, not to mention countless hours dancing around my kitchen banging on pots and pans, ventures into new neighborhoods hunting for exotic ingredients, many inquisitive or delighted looks from my husband as he surveyed the table of my latest creations.  And, of course, many treasured minutes (or hours) at the table tasting and laughing.  When I began this culinary journey, I desired for a challenging kitchen regimen that would spit me out as a better cook.  I wanted a reason to play with new ingredients, learn new preparation techniques, talk with local butchers and farmers... basically, dirty my apron on a regular basis. Mission accomplished.  


So without further ado, let me illustrate for you the lengthy (but completely worth-it) method for making Italian Panettone bread... the final recipe of the challenge.

Step 1: Intoxicate some fruit.

Sultanas, candied orange peels, and lemon-orange
zest were drizzled with rum.

Step 2: Butter  up some sweet batter.

"Sponging" the dough with yeast, butter and sugars. 
Two, 1-hr rising sessions separated with lots of kneading
produced a velvety and elastic dough ready for baking.
The fruit was folded and kneaded into the dough before
being dropped into the baking pan. 
Step 3:  Grow your dough!

After 45 minutes, I opened my oven's door
to find a golden loaf of Panettone sprouting
from the dimensions of the baking pan. 
Traditional Italian Panettone.

So, how did this girl celebrate?  She exchanged her apron for ski pants and chased the snow up into the mountains!  As it turns out, a thick slice of Panettone makes for a perfect pre-ski breakfast (paired with a hot cup of caffeine, oh course)!  This fruity rum bread may have been the last recipe, but I'm keeping it bookmarked as my favorite.

Heading to Arapahoe Basin Ski Resort.
Loveland Pass will only be open a few more weeks. 
A curious cook at play!
Despite the refined onion-slicing, egg-whipping, and squid-gutting skills that I have acquired, there was an additional outcome to completing this challenge. Something more valuable than any of the delicious recipes that I prepared.  I gained my creativity back... Something that I had pushed to the corners of my brain for years to make room for incoming data required for surviving university classes is now pulsing through my daily thoughts. I see the world around me in color again. Everything is so beautiful...  even the slushy, muddy mess that will remain in my entry way until spring.

Thank you for joining throughout my culinary tour of Italy!  Stay tuned for many more food-inspired stories to come!  Ciao Italia! 

Friday, October 28, 2011

Italy Part 30

Mushroom walks into a bar. 
Bartender says, "We don't serve mushrooms." 
Mushroom says, "But I'm a 'fun guy!'" 
Bartender says, "I just said that don't serve fungi." 
Mushroom says, "No, no, not 'fungi,' 'fun guy.' I made a pun!" 
Bartender says, "Get the *bleep* out of my bar."

Mushrooms may not be as witty as they are 'fun guys' to eat! Hehe. Last week I prepared the following recipe, Sauteed mushrooms with garlic (p. 100).  This dish paired nicely with warm, crusty bread as an elegant appetizer. 

Mushrooms sauteed in oil and garlic.
More cooking with fresh thyme, followed by high and low
temperature cycling to allow the mushrooms to release and
evaporate their juices. The final step required stirring in
fresh parsley, salt and pepper to taste.
Sauteed mushrooms with garlic.
This Italian cooking challenge is
now 99% complete!

In my last Italian entry I mentioned that I have been tallying all of the recipes listed for this cooking challenge using a separate word file on my desktop. Today, I cut and pasted it below so that you can observe how far this challenge has come since early June. Please note that I was forced to modify this challenge a smidgen by throwing out seven recipes (listed at the bottom) due to equipment, budget or ingredient availability constraints.   Current standing: 74 recipes down with only 1 to go!! 


RECIPES TO MAKE (n = 1)
Panettone (p. 146)


COMPLETED RECIPES (n = 74)
Sautéed mushrooms with garlic
Zuppa inglese
Rabbit with rosemary and white wine
Involtini of swordfish
Olive bread
Herb baked ricotta
Zabaglione
Chicken liver crostini
Polenta squares with mushroom ragu
Green beans with garlic breadcrumbs
Seafood risotto
Spaghetti with sardines, fennel, tomato
Stuffed crepes
Penne alla napolitana
Biscotti
Roasted rosemary chicken
Baked radicchio
Cassata alla siciliana
Caponata with tuna
Veal steaks with prosciutto
Panzanella
Minestrone with pesto
Mussels in tomato and herb sauce
Gnocci romana
Insalata di frutti di mare
Honey and pine nut tart
Orecchiette with broccoli
Roman lamb
Rosemary potatoes
Sautéed silver beet
Fried olives
Stuffed sardines
Baked eggplant with tomato and mozzarella
Espresso granita
Mozzarella in carozza
Marjoram salmoriglio
Spagnettini with garlic and chilli
Sicilian rice fritters
Fennel fritters
Pork chops in marsala
Carciofi all romana
Macerated oranges
Almond semifreddo
Tomato and basil crostini
Semi dried roma tomatoes
Bean and rosemary dip
Grilled squid with salsa verde
Focaccia
Bucatini alla norm
Lingunie pesto
Bucatini amatricana
Pizza rustica
Mushroom risotto
Arancini
Chicken caccitori
Shaved fennel salad
Frittata di asparagialla menta
Strawberries with balsamic vinegar
Figs and procuitto
Stuffed peaches
Pappa al pomadoro
Rocket and pecorino salad
Parmesan and rosemary crusted veal chops
Salsa rossa
Lemon granita
Roasted balsamic onions
Baked peppers with anchovies
Spaghetti puttanesca
Olive crostini
Napolentana crostini
Tuna and cannelloni bean salad
Chimneysweeper’s gelato
Insalata caprese
Homemade pizza (seen here)


RECIPES NOT PREPARED (n = 7)
Sicilian cannoli (p. 144)
Reason: Did not have proper equipment to roll cannoli shells, however, I did purchase all of the ingredients for the creme filling to put into pre-made cannoli shells. These were forgotten about during my stay in Minnesota so perhaps my mother will be the guest chef to present this recipe in the future. 

Fritto misto di mare (p. 125) 
Reason: Mullet and cuttlefish not available

Fried whitebait (p. 100) 
Reason: Whitebait not available

Stuffed zucchini flowers (p. 88)
Reason: Flowers not available. At the farmer's market I was told by multiple zucchini growers that the act of picking the flower from the squash kills the zucchini, so they do not harvest these flowers since the demand for zucchini is greater. 

Fegato garbo e dolce (p. 121)
Reason: I couldn't find organic, grass-fed cattle from which these calves livers are taken from. Calves livers are available at specialty delis, however, I just can stomach the idea of eating an organ that filters out toxins from poorly reared animals.

Homemade pasta (p. 106)
Reason: Can't afford to invest in the equipment

Herb filled ravioli with sage butter (p. 112)
Reason: Can't afford to invest in the equipment

Friday, October 21, 2011

Italy Part 29

I feel as though I'm rounding the last bend and speeding towards the finish line of my Italian cooking challenge. Since the beginning of the challenge in early June, I've been keeping track of the recipes using a word document saved to my desktop. Each week I open it up, map out the next Italian meals and dishes to be made, prepare a grocery list, and schedule blog posts.  Today, I opened up this document only to see one remaining recipe that has not been crossed out!  Just one!

However, let's save the balloons and ribbons until that final day comes. Besides,  I have some catching up to do with sharing some previously made recipes!  Let me share with you another elegant Italian cake called, Zuppa inglese (p. 142), aka "cold cake." Making this cake began with preparing the foundation: "Madeira cake." I wasn't exactly sure what this was, and of course, my local grocery stores don't carry any. Remembering back to the Madeira-infused Cassata all Siciliana cake from last month, I made the same sponge cake recipe drizzled generously with Madeira wine. 

The sponge cake fresh out of the bunt pan,
anticipating a shower of Madeira wine.
Cutting the cake into three separate layers. 

After the boozy cake base was ready, I made the custard filling.  In the past, the only homemade custard I have made involved following the directions on the back of a box of flan pudding.  Italian custard is bit more complicated. First, slowly heat a pan of milk containing a split vanilla bean. While the milk is heating, whisk egg yolks, flour and sugar to create a pale, creamy batter. Once bubbles begin to form on the sides of milk pan, add the egg yolk mixture to the milk and stir over medium heat until the custard boils. Continue to stir until it thickens.  

Left: Egg yolks, flour and sugar.
Right: Milk and vanilla bean.   
Stirring, stirring, stirring.
After about 30 minutes, the custard looked like this. 

Once the custard mixture had thickened, I removed the pan from the burner and allowed it to cool slightly.  During this time, I had to apply more alcohol to the Madeira cake. This time rum mixed with a little bit of water. I was surprised by how much liquid I was giving the cake, however, perhaps it was to prevent the cake from drinking up the custard (remember, this same sponge cake soaked up all of its whipped cream topping in the past). The final step was assembly: a layer of cake, a layer of custard, another layer of cake, another layer of custard... finishing with a layer of custard sprinkled with chocolate shavings and sliced slivered almonds.

Custard layers.
Notice that the hole from the bunt pan was filled in
with extra sponge cake cut from the bottom. 
Zuppa inglese, 
another elegant Italian dessert!

The hardest part of this recipe involved waiting the minimum three hours to allow the cake to refrigerate.  Once that timer goes off, grab a fork and sharpen your elbows. This cake so good it's worth fighting over. In fact, my husband and I finished this entire sweet-tiered masterpiece in two days!

Wednesday, October 19, 2011

Italy Part 28

Have you ever scratched your chin wondering whether to have an after dinner drink versus a sweet treat? Introducing,  Zabaglione (p. 140).  A dessert that allows you both... in one glass!  I realize that the past few entries have been quite lengthy, so here is a refreshingly short entry of a neat little Italian treat that requires only three ingredients and an electric mixer.

Zabaglione,
A wine mousse of sorts.

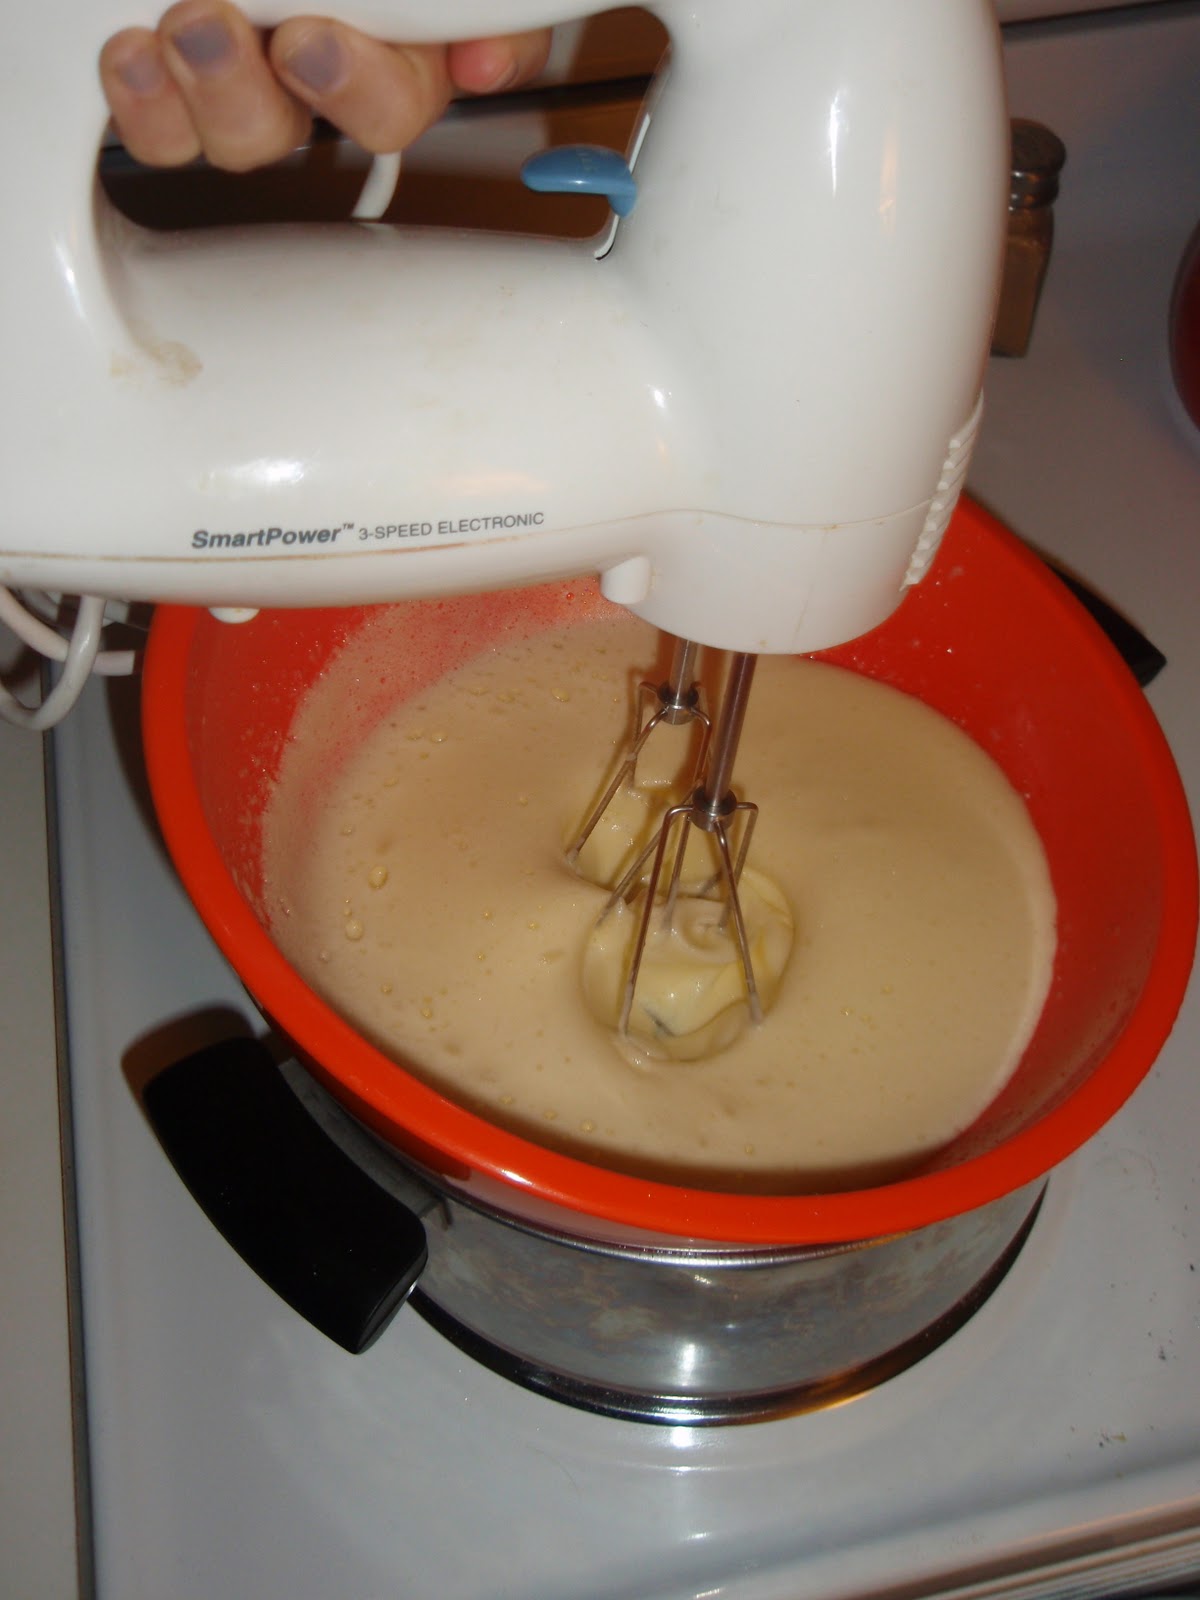
Simply combine 4 egg yolks, 1/3 cup sugar, and 1/3 Marsala wine with an electric mixer in a large bowl over a pot of simmering water until the mixture is smooth and foamy (nearly tripling in volume). That is it! The result is a creamy, mousse-like drink that you eat with a spoon.  Neat, eh?

Placing my ingredients over barely boiling water.
Mixing non-stop for about 5 minutes.
The mixture begins to grow before your eyes!
It makes about 4 cups.

I will note that you may want to consume immediately or within a few hours after making. I ate one fresh (pictured above) and it was perfect! Light and fluffy. Sweet and fruity. After a night in the refrigerator, the others had deflated into a half foam, half liquid mixture... not as appetizing... so grab a few friends before making so that you can finish the batch while it's fresh.  Tootles!

Sunday, October 16, 2011

Italy Part 27

During my visit to Minnesota, my parents were willing to let me take over the kitchen and prepare two Italian meals in order to keep my Italy challenge alive. I actually got to reference their copy of the cookbook, since I had gifted them with the same book that they had gifted me all those years ago, hoping to share the inspiration that it brings me! But really, I could have used any excuse to cook something in that kitchen. I imagine myself as a celebrity chef as I strap on my mom's french apron and dance around the open space, preparing ingredients on the miles of counter surfaces, searching through the fridge and pantry holding a deep catalogue of food items, and banging around state-of-the-art cookware that I dream of having in my own kitchen someday... glee! Anyways, it is always fun to pretend, especially since my two cats are really good at listening to my "cooking demos."

Soaking up a slice of homemade limelight.
Truth be told, I'm actually terribly camera shy.

Let's start with the meal that includes "furry critters" as the main course. I can't say that I am particularly fond of rabbit, and thank goodness because its price-per-pound worth is over $18!  I purchased a frozen, pre-quartered and humanly caught rabbit from a specialty store in Chanhassen, MN (for occasions like this I place all of my trust into knowledgeable butchers).  After thawing the meat and unwrapping the packaged contents, I was quite impressed with how beautiful this tiny animal's meat was. The meat had a nice pink color with a clean, translucent skin layer over the top. Much more visually appealing than even poultry!  I said a little blessing and got busy. 


Meal #1:
Rabbit with rosemary and white wine (p. 135)
Olive bread (p. 138)
Mixed greens salad

Dinner preparation started with "proofing" the baking yeast
for the Olive bread. Yep, looks alive and ready to go!
While I prepared the dough ingredients, the rabbit was slowly
thawed in a cold water bath in the sink.
What I consider fanciful meat.
Step 1 of cooking rabbit:
Coat with bread crumbs and seasonings, then give
the pieces a good fry in some oil before setting aside.
Step 2 of cooking rabbit:
Once the sauce has been prepared separately, add back the
crispy rabbit pieces and let simmer on low heat for about 2 hrs.
The white wine, sage, rosemary, garlic, tomatoes, stock, and a
pinch of cayenne (to name a few) made for such a nice base.
The bread dough continued to rise for a second time in the
warmth of the setting sun on the front porch.  The recipe called
for white flour only, however, we ran out mid-recipe, so whole
wheat was substituted. It added a nice, rustic brown color.
The dough was rolled out, decorated with Kalamatas (yum!),
then delicately folded over to make a "loaf" before baking.
I plated the rabbit with only a few more minutes left for the bread.
Next time, I won't be so shy adding olives. Even so, this bread
turned out better than expected (my bread never turns out right
so I feel like I far exceeded failure this night)!
We ate family-style for this meal in compliance with the Italian theme.
After a few hesitant bites from my Dad, Mom, and myself, we happily
cleaned our plates.  Plus, we had Adele's custard to look forward to...

My first time trying rabbit was in Mexico last October (2010). It was cooked in cactus skin and it had a particularly gamey taste to it. I braced myself for the same underlying flavors, however, this Rabbit with rosemary and white wine dish was nothing but tender and savory. Truly, "It tasted like chicken!"  And the tomato-wine sauce was divine. My mom mentioned making the sauce again to top other meats or pastas in the future. Preparing this dinner took a lot longer than expected since I missed the step about letting the Olive bread rise twice (oops). We filled the extra hour with additional porch time with a cold beer, snacking on extra Kalamatas. Perhaps the secret to how well the rabbit turned out was in letting the sauce simmer over low heat for nearly an extra hour. 

The second meal required a bit of help from my Dad, the "grill master" of the family. We were having grilled swordfish skewers, a recipe that I would have prepared on my cast iron panini press if I had been making this in Denver.  As it turns out, cooking swordfish was not an option. The same specialty butcher that I sourced the rabbit from had informed me that they were totally out of swordfish and would continue to be for quite some time. Why? The mercury concentration in the meat was sky high! The butcher explained that they test all of their seafood for mercury before accepting deliveries, and recent deliveries did not meet their safety standards... not by a long shot. I also checked my local "budget" grocery store just to see if they would have any (albeit loaded with mercury levels gone unchecked). To my surprise, they didn't carry swordfish either, but not because of mercury levels. This butcher explained that they don't carry it since the meat is so expensive and no one would buy it. What's the next best option as a swordfish substitute? Tuna steaks! 

Meal #2:
Involtini of swordfish tuna (p. 134)
Herb baked ricotta (p. 102)
Leftover olive bread

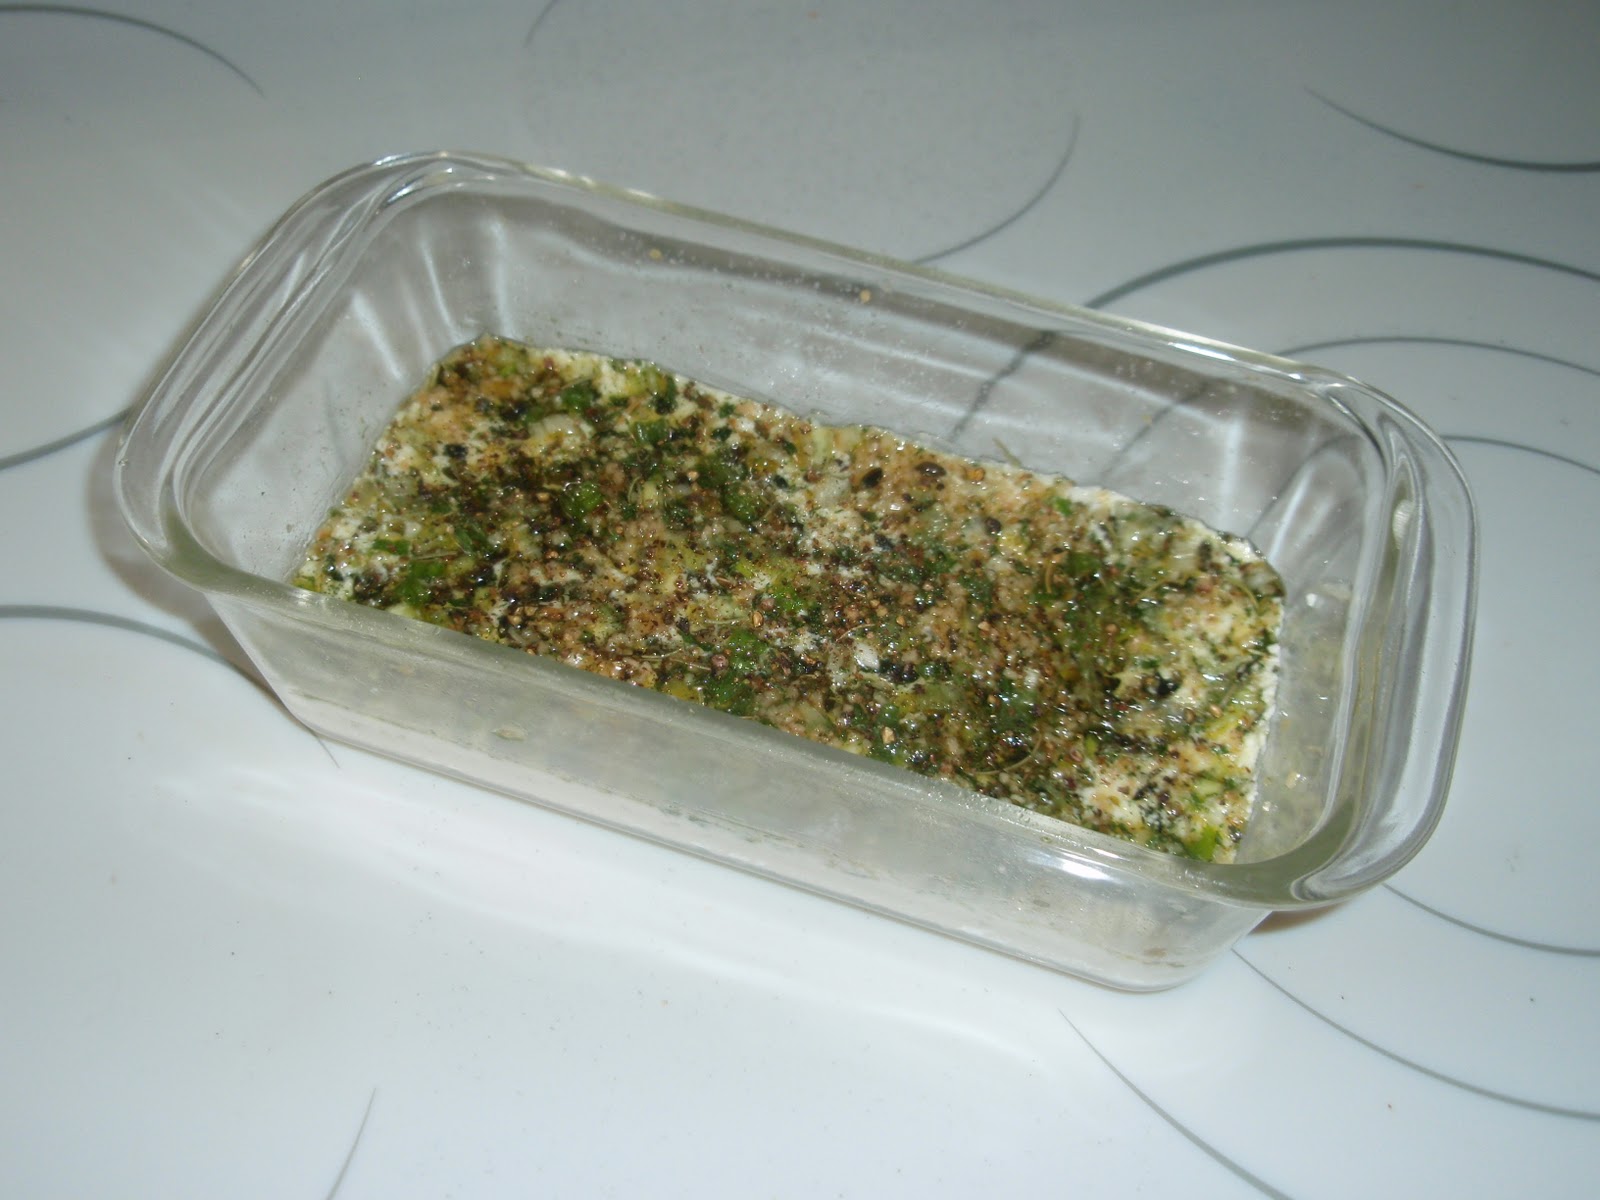
The ricotta recipe was started 2 days in advance.
Day 1: Drain off remove excess moisture.
Day 2: Marinade with a cocktail of fresh herbs and oil.
Day 3: Bake in the oven until golden, about 30 min at 350 F.
Since the ricotta was prepared ahead of time, it was
ready as an appetizer in the amount of time it
took the tuna skewers to be assembled.
To assemble the stuffed tuna skewers, the steaks were rolled
out flat between two sheets of plastic wrap and then divided.
I pre-made the stuffing the night before (breadcrumbs, egg, seasonings),
which accelerated prep time. All that was needed was wrapping each
thin steak piece with stuffing, counting out fresh bay leaves,
peeling lemons to reserve their rinds, and slicing pearl onions.
Food beading.
Alternately, I threaded a lemon ride, bay leaf,
and stuffed tuna steak. After all of the pieces were assembled,
they were brushed with a lemon juice and olive oil mixture
and handed over the grilling expert.  
About 5 short minutes later... dinner was ready!
The cooking time was so fast, I hadn't even gotten
the chance to look over his shoulder!

I also lost track of my photo-documenting responsibilities and failed to snap a shot of what our dinner plates looked like. My brother Mike made it home to join us at the dinner table. Once our bellies were full of flakey, charcoal-kissed tuna steaks, we all got busy making cookies and prepping other recipes to be enjoyed with our much anticipated visitors from Chicago, Baltimore, and Milwaukee!  

Food never fails to bring people together.