Showing posts with label Bread. Show all posts

Thursday, December 8, 2011

A Bierocks Tradition

Although my childhood was spent living between Kansas, Texas and Minnesota, I consider myself to be a Kansas gal. I was born in Kansas. Both of my parents are from Kansas, and their parents' parents are from Kansas, and the majority of our living relatives remain within Kansas boarders today.  

Kansas. I think of this state as a humble gem at the center of America. Its soils are studded with golden limestone and frosted with waving wheat fields stretching as far as the eyes can see. These flat prairie lands accentuate the limitless sky above displaying cottony clouds and brilliant coral sunsets. Quiet gravel roads thread veins through old farming lands where immigrant European farmers once settled years ago. The only reminders of modern times in rural Kansas come from shiny combines juxtaposed with dilapidated barns.  Two of my great grandfathers farmed these fields. They were both Germans immigrants who were stubborn enough to tame the great plain's hard clay soils and unwieldily storms. They were determined to make a living for themselves and their families. I am part of the 4th generation, with fond memories of wheat and soybean harvests. Over so many years, however, many traditions from my German heritage have been lost with the land.  

And then again, there are Bierocks... 

Related to the pierogi.

My mother has been making these beef-and-cabbage stuffed buns for quick weeknight meals ever since I can remember. It has always been a family favorite. And very German! Well... to be more accurate, they are actually very Volga-German. In other words, they originated from ethnic German communities living along the Volga River in Russia. These peoples were allowed to continue practicing their religion and maintain their language. It wasn't until the 19th and early 20th centuries that many migrated to the Americas. Interestingly, while Joe and I made the long journey to Denver via I-70 (straight west through Kansas flint hills) we discovered that there are a few obvious reminders of the old Volga-German communities, such as a grand Cathedral erected from the land's limestone deposits by Roman Catholic German settlers over a hundred years ago.  

Victoria, Kansas.

In order to keep such a small piece of my family's history alive, I want to share with you a Bierocks story. My mother's recipe calls for quick Jiffy dough (modernization for new generations of working women), however, I was craving something as traditional as possible. In doing a little internet searching, I stumbled across a wonderful newspaper article written about another Kansan who wishes to preserve such a tasty tradition. In fact, has made a successful business out of it! While reading this article, I realized that there are a few variations of Bierocks, for example, thin versus thick dough, or sauerkraut versus carrot additions.  I merged his recipe with my mother's to create a recipe (below) that most aligns with my personal childhood memories of a family favorite.  

My Bierocks story:

Prepare the sweet yeast dough first.
While dough is rising, brown the ground beef in a large skillet.
While meat is cooking, shred cabbage and carrots, and dice
up some purple onion. 
Add the veggies to cook in the meat fat until tender.
The risen dough is now ready for sectioning.
This is how I keep my dough "warm" despite a cold apartment:
I heat up an inch of water in a large pan, turn off the heat,
and then set my dough bowl on top.
Grab a handful of dough and spread it thin.
Fill dough with meat and cabbage mixture.
Let your raw Bierocks set so that the dough can rise
a bit once again.
Bake your buns and then brush their tops with butter!
Enjoy with mustard...
or ketchup if you feel like being more American!

Traditional Family Bierocks
Makes 12
Serves 4 (most individuals consume 2-3 buns each).

Dough:
1 Tbsp. dry yeast
1/3 cup warm water
2.5 Tbsp. sugar
1/2 stick butter, melted
2 1/3 cups flour ("Yay" for wheat!)
1/3 cup milk
1/4 teaspoon salt

Filling:
1 lb. ground beef
1/3 head cabbage, shredded and chopped
1/2 purple onion, diced
2 carrots, peeled and shredded
Salt and pepper, to taste

First, prepare the dough. Combine yeast and sugar in warm water in a large bowl until dissolved. Set aside until foamy (5-10 minutes).  Add melted butter, then flour, then milk and salt. Add more milk if dough gets too dry.  After mixing, knead until smooth (about 10 minutes). Transfer to a greased bowl, cover with a tea towel, and let rise until doubled (about 1 hr).

While dough is rising, cook the filling. First brown beef in a large skillet over medium heat. Drain excess fat (if any). Add veggies and salt and pepper to taste.  Turn heat down to medium-low heat and cook slowly until veggies are tender. Remove from heat and set aside until dough is ready for stuffing.  Note: if you like sauerkraut, add about 1/2 cup now.


To assemble Bierocks, portion dough into 3-ounce balls (about 1 small handful). Roll out flat to about 1/2 inch thickness. Place 1/2 cup of meat mixture into the center of each, pull corners of the dough over the filling and pinch together in a nice seam. Place stuffed dough balls, seam side down, onto a lightly greased baking sheet and let rise another 20-30 minutes. During this time, preheat oven to 350 degrees. Bake for 25 minutes, or until browned. After removing buns form the oven, brush the tops with butter. Serve with spicy mustard and a pint of wheat ale.

Note: Bierocks keep well in the fridge for up to 3 days after preparation.  I love making extra to bring to work because they are easy to take on the go!

Friday, November 4, 2011

Slovakian Schnitzel Supper

The country of Slovakia (not to be confused with Slovenia) is hardly known by most Americans.  I, myself, couldn't tell you three things about the small, Eastern European country until I met my husband, Joe, six years ago! Joe was born in Slovakia and moved with his family to the United States when he was five years old.

Shortly after the end of communism,
Czechoslovakia disbanded into two separate countries.  

One of the many things that I hold close to my heart in regards to Joe's family, is our time around the table. For me, sharing meals also means sharing tradition, history, and love. And let me tell you something... traditional Slovakian food is nothing short of delicious!  Joe's mother, the family chef, is an inspiration to me. Ever since the first time watching her buzz around the kitchen preparing recipes etched only within her memory, I knew we spoke the same language of food. From fluffy pastries to  crispy schnitzels, I have relished every Slovakian dish I've ever tasted.

Now that I am responsible for Joe's nutritional well being, I am adamantly "training" to adopt some of his family's favorite and traditional Slovakian dishes into our own eating routine. The true test, and my future goal, is to have his family sit at my table for an authentic taste of home!  I have posted my recipes below so that you, too, can prepare a memorable Slovakian dinner.

The Menu:
Pork Schnitzel
Sweet-and-Sour Cabbage Slaw
Steamed Bread Dumplings


Schnitzel is more commonly served with potato salad, however,
Joe and I were both craving this cabbage slaw (also amazing).


Slovakian Pork Schnitzel
Serves 8

4 pork chops
1 cup flour
1 cup breadcrumbs
2 eggs, slightly beaten
4 tbsp. milk
2/3 to 1 cup oil (vegetable oil or light olive oil)
Salt and pepper
Lemon for garnish (optional)

Remove membrane or any large pieces of fat from pork chops. Carefully slice the pork chops in half, lengthwise, so that you get 8 thin pieces. Pound the pieces with a mallet to tenderize and thin further. Season the pork with salt and begin to heat oil in a frying pan over medium heat. Combine the egg and milk in a shallow bowl. Place the flour and breadcrumbs in separate shallow bowls or plates. Season the flour with salt and pepper. Coat the cutlets with flour well, then dip in egg, and lastly by bread crumbs. Depending on the size of the pork cutlets, more flour, egg, and breadcrumbs may be needed. Fry the cutlets, a few at a time, in the heated oil until crispy and brown on both sides. Depending on the size of the pan, more oil may be needed to make sure that there is enough for frying to take place. Put the fried cutlets on paper towels to absorb excess grease. Serve the schnitzel with fresh lemon slices (optional). 


Slovakian Sweet-and-Sour Cabbage Slaw
Serves 8-10

1 head green cabbage
2 medium sized onions (red or yellow)
2 carrots
200 ml (between 3/4 and 1 cup) vinegar (cider vinegar works, too)
2 tbsp. sugar
1-3 tbsp. oil
Salt and pepper
Green olives and seeded hot pepper (optional)

Rinse all vegetables. Slice the cabbage and onion into thin slices. Shred the carrots. Steam cabbage, onion and carrots to slightly soften, about 5-7 minutes. Whisk the vinegar, sugar, and salt and pepper (to taste) in a large bowl. While the vegetables are still warm from steaming, mix them with the vinegar dressing and allow to cool. Once cool, stir in the oil and serve. Sliced green olives or seeded, sliced hot pepper can also be added for variety (optional).  


Steamed Slovakian Bread Dumplings
Serves 8

3 1/4 cups all-purpose flour
1 cup milk
20 g dry yeast (~2.5 packages that are 7 g ea.)
1 egg
2 teaspoons salt
Water as needed

Temp the yeast by warming the milk and then mixing in the yeast. Let sit for 10 minutes or until the milk appears frothy (if not, the yeast is dead so buy new and start again). Whisk the salt into the flour in a large mixing bowl, then mix in egg to form a dough (add a small amount of water if needed). Knead on a lightly floured surface about 2 minutes. Place into a lightly greased bowl, cover with a tea towel, and set in a warm place to rise until double in size (about 45 minutes).  While the dough is rising, prepare the cooking pot. Do this by filling a large cooking pot ~1/3 full of salted water.  Drape a tea towel over the top of the pot and fix the towel to the pot's handles using string, so that the towel is pulled tight enough to create a "table" for the dough to rest. Locate a pot of similar size to use as a lid. After the bread dough has risen, heat the pot of water to a low boil. Turn out the dough over a lightly floured surface and separate into small handfuls of dough pieces. Roll each piece slightly to get rounded edges and place the dough balls (6-8 at a time) on top of the tight towel over the pot's boiling water. Cover with an upside-down pot (see picture below), and let cook for 20-25 minutes. Note: Steam is what is cooking the dough, so do NOT lift the lid to check on them before the cooking time is up!  Repeat with the rest of the dough pieces and serve immediately. 

Cooking pot assembly for Steamed Bread Dumplings

Sunday, October 16, 2011

Italy Part 27

During my visit to Minnesota, my parents were willing to let me take over the kitchen and prepare two Italian meals in order to keep my Italy challenge alive. I actually got to reference their copy of the cookbook, since I had gifted them with the same book that they had gifted me all those years ago, hoping to share the inspiration that it brings me! But really, I could have used any excuse to cook something in that kitchen. I imagine myself as a celebrity chef as I strap on my mom's french apron and dance around the open space, preparing ingredients on the miles of counter surfaces, searching through the fridge and pantry holding a deep catalogue of food items, and banging around state-of-the-art cookware that I dream of having in my own kitchen someday... glee! Anyways, it is always fun to pretend, especially since my two cats are really good at listening to my "cooking demos."

Soaking up a slice of homemade limelight.
Truth be told, I'm actually terribly camera shy.

Let's start with the meal that includes "furry critters" as the main course. I can't say that I am particularly fond of rabbit, and thank goodness because its price-per-pound worth is over $18!  I purchased a frozen, pre-quartered and humanly caught rabbit from a specialty store in Chanhassen, MN (for occasions like this I place all of my trust into knowledgeable butchers).  After thawing the meat and unwrapping the packaged contents, I was quite impressed with how beautiful this tiny animal's meat was. The meat had a nice pink color with a clean, translucent skin layer over the top. Much more visually appealing than even poultry!  I said a little blessing and got busy. 


Meal #1:
Rabbit with rosemary and white wine (p. 135)
Olive bread (p. 138)
Mixed greens salad

Dinner preparation started with "proofing" the baking yeast
for the Olive bread. Yep, looks alive and ready to go!
While I prepared the dough ingredients, the rabbit was slowly
thawed in a cold water bath in the sink.
What I consider fanciful meat.
Step 1 of cooking rabbit:
Coat with bread crumbs and seasonings, then give
the pieces a good fry in some oil before setting aside.
Step 2 of cooking rabbit:
Once the sauce has been prepared separately, add back the
crispy rabbit pieces and let simmer on low heat for about 2 hrs.
The white wine, sage, rosemary, garlic, tomatoes, stock, and a
pinch of cayenne (to name a few) made for such a nice base.
The bread dough continued to rise for a second time in the
warmth of the setting sun on the front porch.  The recipe called
for white flour only, however, we ran out mid-recipe, so whole
wheat was substituted. It added a nice, rustic brown color.
The dough was rolled out, decorated with Kalamatas (yum!),
then delicately folded over to make a "loaf" before baking.
I plated the rabbit with only a few more minutes left for the bread.
Next time, I won't be so shy adding olives. Even so, this bread
turned out better than expected (my bread never turns out right
so I feel like I far exceeded failure this night)!
We ate family-style for this meal in compliance with the Italian theme.
After a few hesitant bites from my Dad, Mom, and myself, we happily
cleaned our plates.  Plus, we had Adele's custard to look forward to...

My first time trying rabbit was in Mexico last October (2010). It was cooked in cactus skin and it had a particularly gamey taste to it. I braced myself for the same underlying flavors, however, this Rabbit with rosemary and white wine dish was nothing but tender and savory. Truly, "It tasted like chicken!"  And the tomato-wine sauce was divine. My mom mentioned making the sauce again to top other meats or pastas in the future. Preparing this dinner took a lot longer than expected since I missed the step about letting the Olive bread rise twice (oops). We filled the extra hour with additional porch time with a cold beer, snacking on extra Kalamatas. Perhaps the secret to how well the rabbit turned out was in letting the sauce simmer over low heat for nearly an extra hour. 

The second meal required a bit of help from my Dad, the "grill master" of the family. We were having grilled swordfish skewers, a recipe that I would have prepared on my cast iron panini press if I had been making this in Denver.  As it turns out, cooking swordfish was not an option. The same specialty butcher that I sourced the rabbit from had informed me that they were totally out of swordfish and would continue to be for quite some time. Why? The mercury concentration in the meat was sky high! The butcher explained that they test all of their seafood for mercury before accepting deliveries, and recent deliveries did not meet their safety standards... not by a long shot. I also checked my local "budget" grocery store just to see if they would have any (albeit loaded with mercury levels gone unchecked). To my surprise, they didn't carry swordfish either, but not because of mercury levels. This butcher explained that they don't carry it since the meat is so expensive and no one would buy it. What's the next best option as a swordfish substitute? Tuna steaks! 

Meal #2:
Involtini of swordfish tuna (p. 134)
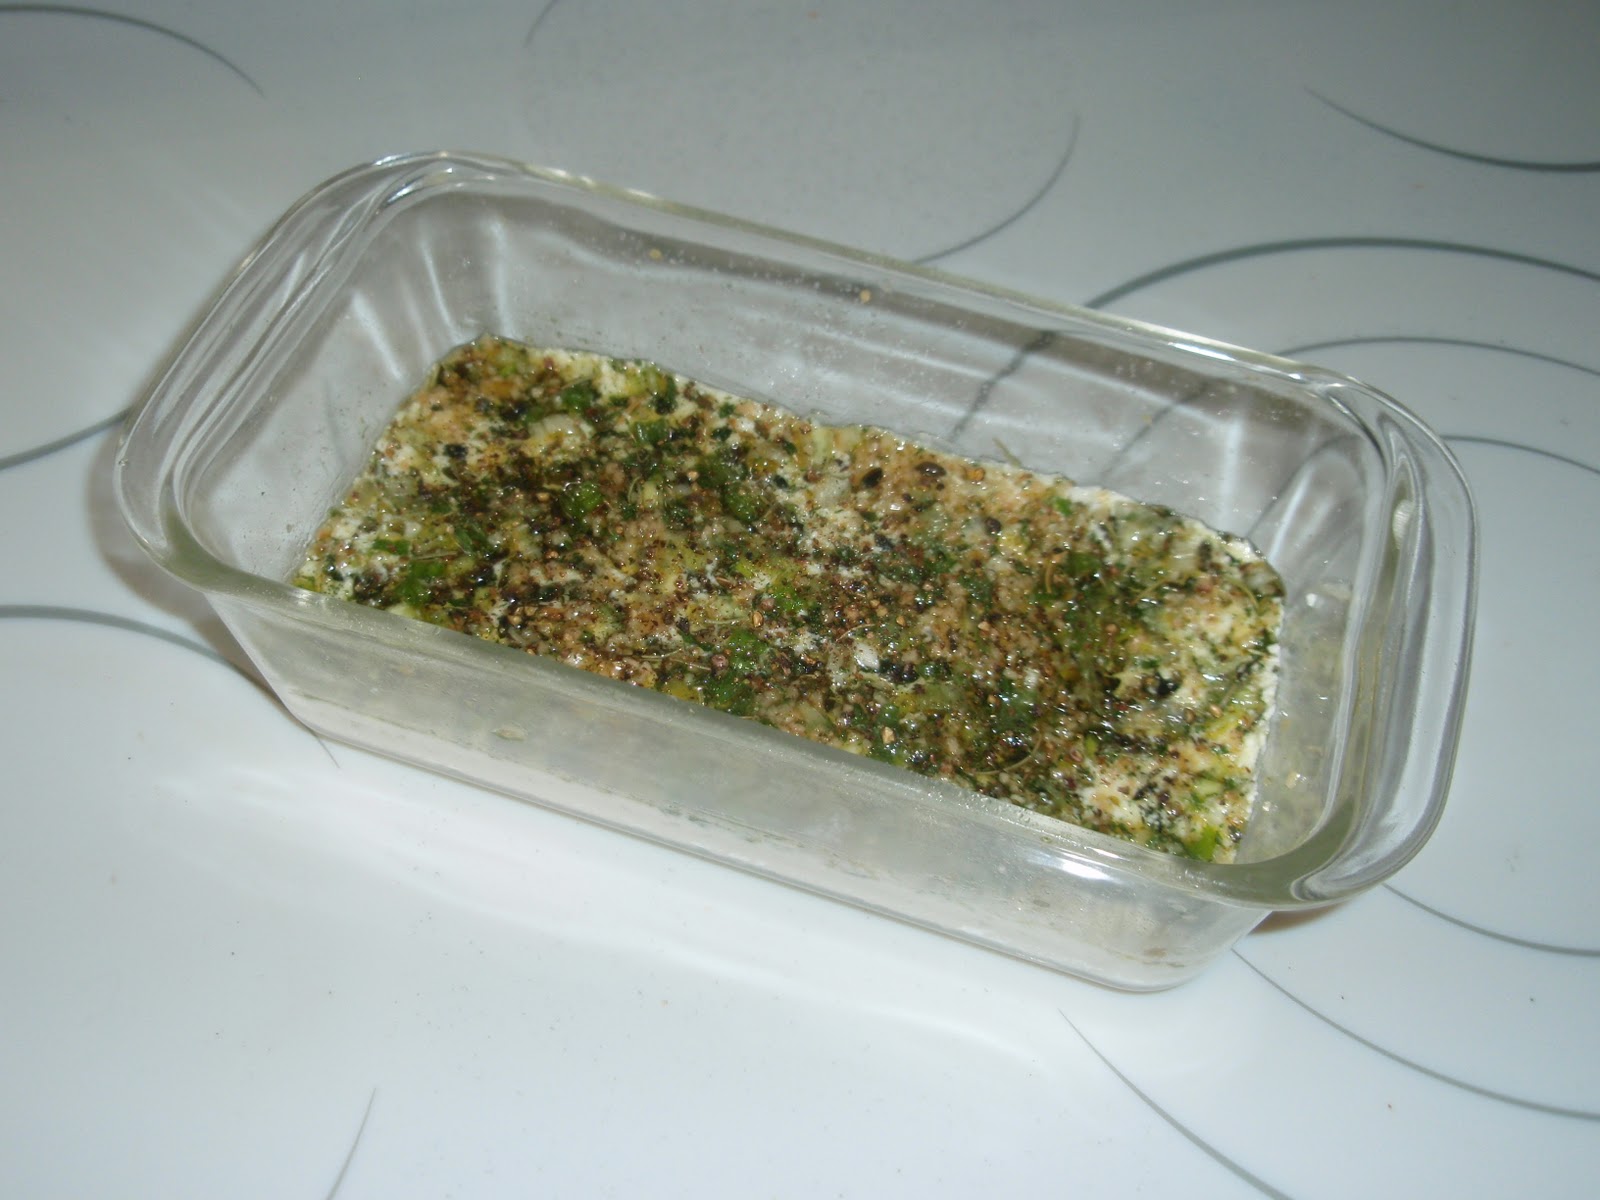
Herb baked ricotta (p. 102)
Leftover olive bread

The ricotta recipe was started 2 days in advance.
Day 1: Drain off remove excess moisture.
Day 2: Marinade with a cocktail of fresh herbs and oil.
Day 3: Bake in the oven until golden, about 30 min at 350 F.
Since the ricotta was prepared ahead of time, it was
ready as an appetizer in the amount of time it
took the tuna skewers to be assembled.
To assemble the stuffed tuna skewers, the steaks were rolled
out flat between two sheets of plastic wrap and then divided.
I pre-made the stuffing the night before (breadcrumbs, egg, seasonings),
which accelerated prep time. All that was needed was wrapping each
thin steak piece with stuffing, counting out fresh bay leaves,
peeling lemons to reserve their rinds, and slicing pearl onions.
Food beading.
Alternately, I threaded a lemon ride, bay leaf,
and stuffed tuna steak. After all of the pieces were assembled,
they were brushed with a lemon juice and olive oil mixture
and handed over the grilling expert.  
About 5 short minutes later... dinner was ready!
The cooking time was so fast, I hadn't even gotten
the chance to look over his shoulder!

I also lost track of my photo-documenting responsibilities and failed to snap a shot of what our dinner plates looked like. My brother Mike made it home to join us at the dinner table. Once our bellies were full of flakey, charcoal-kissed tuna steaks, we all got busy making cookies and prepping other recipes to be enjoyed with our much anticipated visitors from Chicago, Baltimore, and Milwaukee!  

Food never fails to bring people together.

Saturday, September 10, 2011

Italy Part 19

Badger football is currently on and being an alumnus, I must make this entry short!

Minestrone with pesto (p. 104)

This hearty soup contains a long laundry list of ingredients that come together perfectly!
Borlotti beans (I substituted with pinto), olive oil, onion, garlic, pancetta,
celery, carrots, potato, tomatoes, basil, stock, zucchini, peas, green beans,
Swiss chard, parsley, and pasta! I prepared the homemade pesto
ahead of time and took it out of the freezer to thaw as the soup was simmering.

Panzanella (p. 103)
Saltimbocca (p. 124)

This tomato-bread salad is to die for!
Saltimbocca is a quick way to fix veal. Just slice the veal steaks thin,
rub each with salt, pepper, garlic, and top each with a slice of prosciutto and sage.
Marsala is added to its juices for reduction into a tasty sauce.

Go Red!

Thursday, September 8, 2011

Italy Part 18

On the menu for our Labor Day feast: 

Mussels in tomato and herb sauce (p. 133)
Gnocci romana (p. 114)
Salad and saison

First off, let's have toast to September! May this month bring you joy shared between old friends and new, may it provide cool air for deep sleeping with cracked windows, and may your stomachs and spirits be filled with great food and cheer!  The 23rd is the official start of autumn in the Northern Hemisphere.

Two Jokers Double Wit, Boulevard Brewing Co., Smokestack Series.
The second of three special beer bombers that my brother
has gifted Joe and me. The first was opened on our first camping
adventure, and this bottle was opened to commence the start of fall. 

How do you say "gnocci"? I realized I really had no idea while I was trying to tell a grocery store employee why I needed to find semolina flour.  He just raised his eyebrows at "goo-NA-ch-ee" and suggested we look at the whole sale section. After doing a bit of digging, I can now conclude why that man was giving me weird looks. I was pronouncing the name totally wrong! The pronunciation is more like, "knEE-ah-kee." This sound bite is helpful:

http://www.bbcgoodfood.com/content/knowhow/glossary/gnocchi/glossary.mp3


Essentials of Gnocci romana, an Italian dumpling.
Parmesan and mozzarella cheeses, milk, nutmeg, semolina flour,
as well as butter and cream which are added last.
This dumpling required a special flour: semolina.
Semolina is purified, ground wheat bran and is preferred over
other wheat flours because it has a higher gluten protein content
that allows for more elasticity and shape for pasta and dumplings. 

Slowly heating milk, nutmeg, and salt n' pep a boil.
Semolina flour was sprinkled into the hot milk, one first-full at a time,
to prevent lumps from forming. The mixture became very thick in a hurry and
this thick porridge cooked for about 10 minutes, to soften the flour fibers.
Then egg and parmesan were stirred into the pot. 
The gnocci batter needed to stiffen under refrigeration for one hour.
This step required a "swiss roll tin" lined with baking paper.
I substituted with my broiling pan!

After sliding the dumpling batter into the refrigerator, I started preparing the tomato sauce for the mussels. This sauce was simple, requiring a mixture of oil, garlic, crushed tomatoes, chili flakes and a pinch of sugar to simmer until reduced. This tomato sauce was set aside for later and I prepped the ingredients to cook the mussels in, which simply consisted of sauteed onions and garlic.


I was unclear by the gnocci recipe for how to turn the stiffened flat pan of dumpling batter into a round roll. If it wasn't for the cookbook's picture displaying gorgeous, little dumpling circles for a finished product, I would have cut small squares from the stiffened pan instead of attempting this...

Now that the batter was stiff, it came off of the baking paper without sticking.
I attempted to "roll" the batter into one big log by starting at one end
and slowly rotating it over onto itself, using pressure, while keeping the
parchment paper out. It reminded me of rolling up a thick yoga mat.
Then I rinsed some floss (to get the mint coating off) and sliced the log
into nice 1-1.5 inch wide pieces.
The pieces were arranged on a greases baking dish
(I used the broiler pan, once again, since it was already out)
and smothered them in melted butter, mozzarella, parmesan, cream!

Now that the gnocci were happily baking in the oven (and smelling delicious), it was time to focus my attention back to the mussels.  For some reason, I had always looked at shelled creatures as some extremely difficult delicacy to prepare correctly. However, much to my surprise, they are so easy! From my experience, the rules for preparing shelled clams and mussels are this:

1. Once you bring a bag home, keep them over ice in the refrigerator until you want to cook them.
2. Wash their shells using a stiff brush and cool water, removing any tough fibers ("beards")
3. Discard any broken shells or opened shells.
4. Cook for about 3 minutes in a bit of simmering broth or sauteed veggies until they pop open.
5. Discard any shells that do not open after 5 minutes of cooking.

My shells were cleaned and ready for the hot
pot of sauteed onions and garlic.
As the mussels popped open, I used tongs to remove them from
the heat. Once they had all opened, it was time to drain the
mussel-infused onions, reserving the juices for the tomato sauce.
I kept the onions to be used as a salad topping.
The gnocci buzzer sounded just as I finished tossing
the mussels with the rich tomato sauce.
With the oven still warm after taking out the sizzling dumplings, I sliced up some focaccia to place into the warmed oven while Joe helped set the table. This meal was nowhere near the usual Bar-B-Que fixing that I usually enjoy on Labor Days, however, it did make for one special treat! 

Joe and I pushed our chairs up next to each other so that we could both
access the bowl of mussels. If you want a romantic dinner at home with your
honey, I suggest making this dish.  Just ask me for the recipe!