Friday, January 6, 2012

Rebel Brandy Balls

Oh, the simple signs of January....


We were pretty proud of our little tree for lasting all the way until the New Year. Can't say our Christmas cookies lasted much longer either. In fact, I think the tree and the cookies disappeared with 2011...

Our beloved stash of holiday treats!

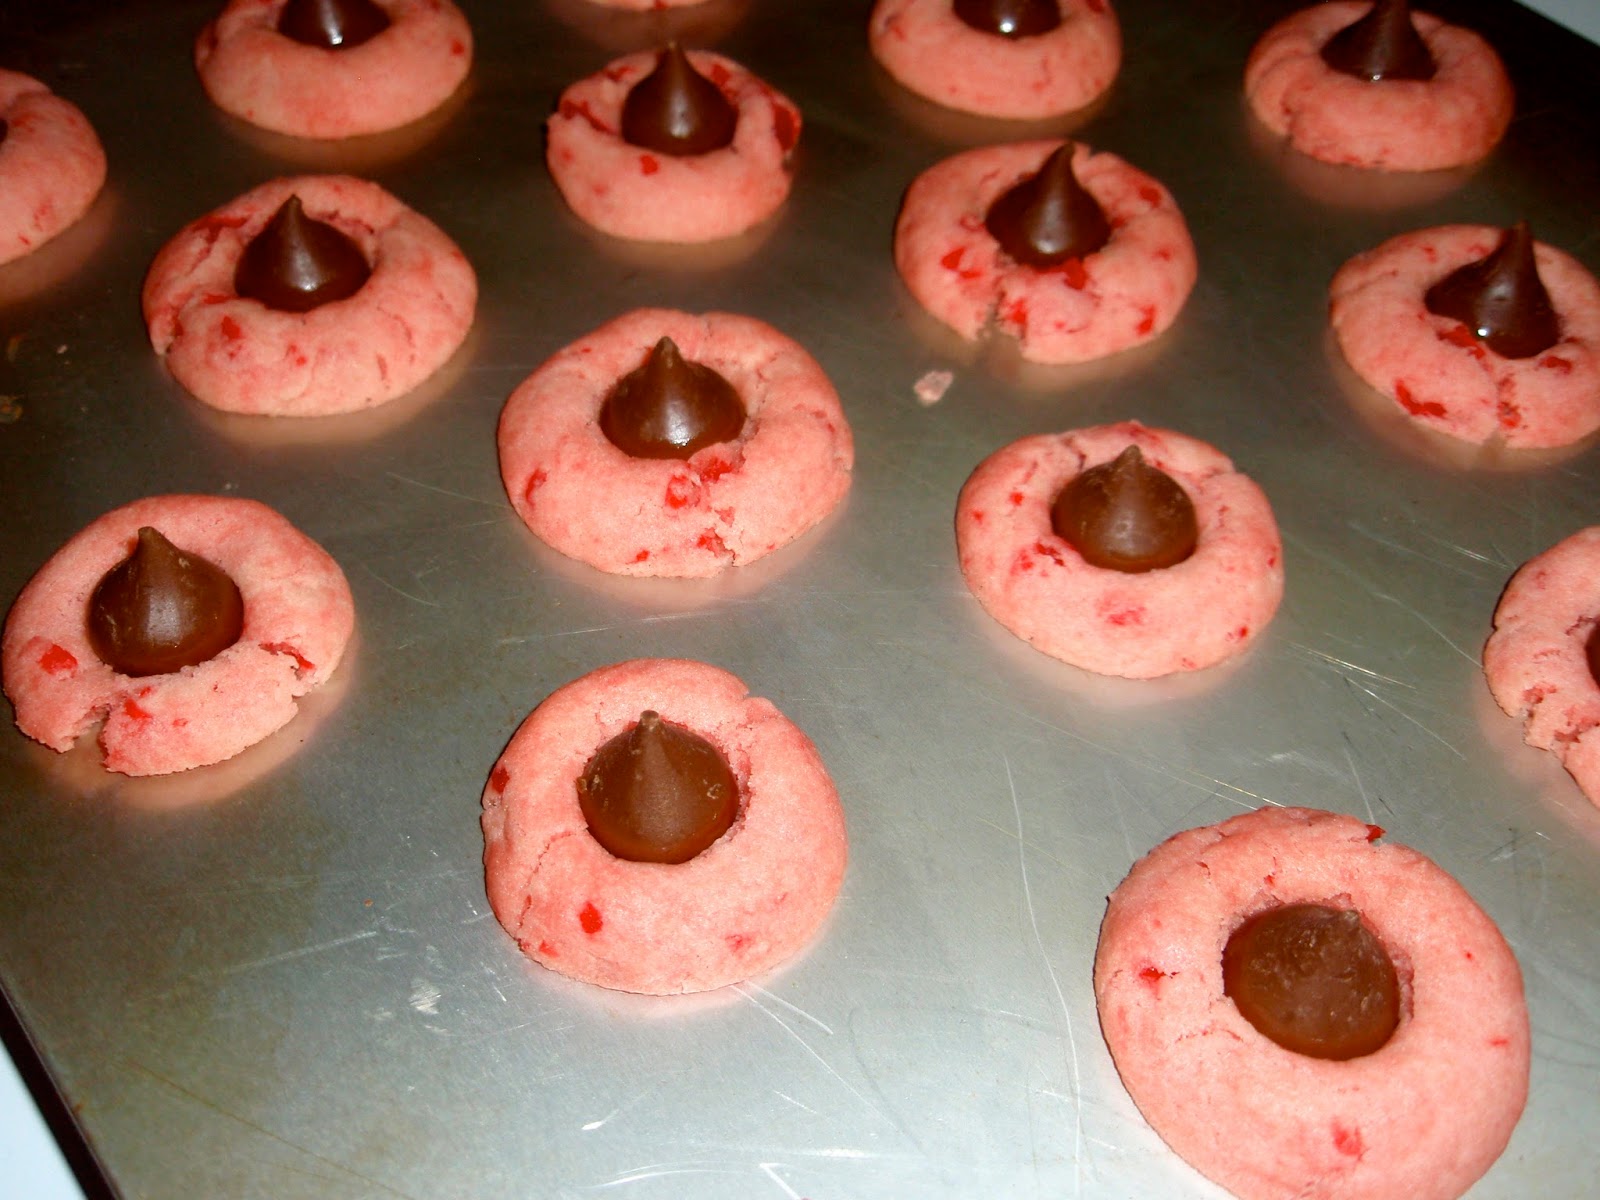
You probably recognize the pink cookies on the left Hershey's kisses hats, but I also want to share another of my cookie exchange contributions. A cookie rebel...  Sour Cherry Chocolate Balls, in the lower right hand corner.  I found this recipe within my Slovakian cookbook's New Year's section so they doubled their holiday duty as a Christmas treat this year.  The recipe called for "preserved sour cherries," however, I used something more special:  homemade Brandied Cherries that have been marinating to sweet drunken perfection since summer! 

Brandied Cherries, aged 6 months.

This recipe requires no baking and few ingredients, but the end result is quite elegant! I especially like how the coconut coating resembles snow. Even though the holidays have come and gone, who doesn't like a sweet memory? In addition, with so little snow fall this year across the nation, perhaps we should start marinating some Brandied Cherries now in order to prepare these Sour Cherry Chocolate Balls as a celebratory treat when the snow finally does come later this spring (fingers are crossed)!

Slovakian Sour Cherry Chocolate Balls

Sour Cherry Chocolate Balls
From "Slovak Cuisine" cookbook
Makes about 2 dozen

1/2 cup granulated sugar
4 Tbsp. water
3.5 oz (3.5 squares) semi-sweet bakers chocolate
1 cup ground walnuts
2 Tbsp. rum
Preserved sour cherries, or Brandied Cherries (recipe below)
Shredded coconut

Pour water over sugar and bring to a boil in a small sauce pan, stirring constantly. Turn off heat and then mix in chocolate, walnuts and rum. Tear off a small bit of this chocolate-nut base, indent with your thumb, and top with sour/brandied cherry. Shape it into a small ball and then roll it in the coconut. Place in mini paper cups. Note: If chocolate mixture is too wet to shape, add additional nuts or perhaps a spoonful of all purpose flour. 

Chocolate-nut base.

Brandied Cherries
Yield varies

1 jar with lid, washed and sterilized
Dried, sweetened cherries (cherry-flavored "Crasins" work too)
Brandy of choice

Simply fill your jar 3/4 full with dried cherries. Then pour brandy over the cherries, making sure that the tops of the cherries are covered. Shake 5 times and let marinade in your liquor cabinet for at least 3 months (the longer it marinates the better the flavors that will develop).  Give your jar a good shake every few weeks.  Note: Cherries will expand as they absorb the brandy. You may have to add additional brandy to keep the tops of the cherries covered. Also, the liquid will become a bit cloudy. This is normal but will be less if you refrigerate your jar after the 3 months mark. 


Enjoy the cherries over ice cream and pour the liquid into
cocktails or beer for a tasty twist on happy hour! 

Tuesday, January 3, 2012

Slovakian Cabbage Pasta Squares

In the weeks leading up to the holidays, I wouldn't get my hands off of my Slovakian cookbook. Second to my mother-in-law, Zela, this cookbook is an inspirational Bohemian reference on new ways to prepare traditional Slovakian foods. I began cooking Slovakian foods because I felt more connected to Joe's family's heritage. The more I prepare Slovakian cuisine, however, I realize that I'm hooked on it for other reasons as well:

Slovak Cuisine, Copyright 2010
ISBN 978-80-07-01817-1
1) It is affordable. 
Potatoes, cabbage, onions, flour, eggs, pork... these are main staples and are usually priced at a bargain. Ingredients steam from what Slovakian people could grow in their fields, bred in their yards, and what they were able to catch or collect in nearby meadows and forests. I still splurge on higher quality cheeses, all-natural sausages, and mostly organic produce, but my grocery bill is still down 50%! 
2) It is fast. 
With a little foresight, dinner can be on the table in 30 minutes tops. Frying and boiling cook everything quicker than you can ring the dinner bell. This is very handy for a cook on the go.
3) It is truly delicious. 
Anyone who is curious about it, please come over and share a meal with me. Or even better yet, click on the label listed as "Slovakian" on the right hand side of this page for an ongoing listing of recipes for you to prepare at home! 

Cabbage Pasta Squares

Here I will show you how to make homemade pasta squares tossed with cooked cabbage. I had always thought that making pasta required expensive spaghetti presses and whatnot. But no. All a person needs is some counter space and a knife! Marvelous.


Prepare a simple dough of flour, egg, water and salt. Thinly roll out the dough on a floured surface and let it sit for a few hours to "dry" slightly. Cut into squares and then boil in salted water. You know your pasta is cooked when it floats to the top!


Drain and rinse your cooked pasta under running water.  Then toss with some butter or oil to keep the pieces from sticking. Sauté some shredded cabbage in a bit of oil with salt and pepper while the pasta is cooking until soft. Toss everything together and dig in! 

Served with a hearty winter salad and olives,
but this would probably also go very well with
a smoked sausages plate.

Slovakian Cabbage Pasta Squares
From "Slovak Cuisine" cookbook
Serves 8

4 cups all-purpose flour
1 egg
1 teaspoon salt
1 cup water
4 Tbsp. butter
4 Tbsp. oil
1 small head of green cabbage, shredded
Salt and pepper to taste

Combine the flour, egg, salt and water to work into a dough. Roll out onto a floured surface and let dry for an hour or two. Meanwhile, cook the cabbage by heating the oil up in a large skillet. Saute the cabbage until soft. Season with salt and pepper. Cut the slightly dried pasta into small squares and toss into salted boiling water. Once the pasta floats to the top, let cook an additional 3 minutes. Drain and rinse pasta under running water. In a large bowl toss with the butter. Add the cooked cabbage and mix well. Season with additional salt and pepper to taste. 

Note: Need a way to use up leftovers?  Try tossing with a simple Alfredo or marinara sauce. Or try combining with other leftovers. We enjoyed ours with some shredded turkey and white gravy!

Getting creative with leftovers!

Sunday, January 1, 2012

2012 Resolutions

Today marks the start of another new year. A fresh start. The first of 365 days that lay ahead to divide and conquer. To fill with happy memories and perhaps a few regrets. Nonetheless, we all charge ahead with hearts full of optimism!  

This morning as we stir from our slumber and groggily fumble for some coffee, many of us are probably thinking about resolutions (you know, like never to guzzle a bottle of Andre... ever again).  Personally, I get all excited pondering ideas for how to become a "better me" this time of year.  In the past I've usually settled for things that I know will get me out of my comfort zone, like learning how to wake board or run a marathon... all of which never ever actualize. So I'm trying something new this year. I'm challenging myself and Joe to fulfill our duties in Colorado as adventurous, rough n' tumble, wild-west residents. Or in other words, complete a list of tangible expectations before the end of June.


Colorado Must-Do List:
Compiled June 2011

As with any list, one can lose sleep over trying to make it as comprehensive as possible. However, I rest easy knowing that there are many great things included, as well as many others that were (and will be) accomplished in addition.  In 2012, I wish to use this list as a compass to motivate Joe and I to continue appreciating all that this beautiful state has to offer. We are so blessed to have so many new and exciting adventures within reach.  

With that, I say best of luck to those of you with lofty New Year's resolutions! May they challenge you to step out of your comfort zone, to enjoy the outdoors, and to tempt your inner spirit of adventure.

Happy 2012!

Saturday, December 31, 2011

New Year's Eve Carp

Before Christmas, I had bookmarked a page in my Slovakian cookbook for Deep-Fried Carp with Potato Salad to prepare for Christmas Eve supper.  Today, however, that bookmark remains. Due to a major time cramp in the kitchen caused from preparing for our out-of-town holiday getaway, I substituted with a quick clam chowder recipe. Joe and I have now returned from our family tour in the northern Midwest and I'm once again turning to that bookmarked recipe. It is going to be our New Year's Eve supper!

And as it turns out, this fried-fish recipe is very fitting for the occasion... carp on New Year's Eve! I didn't realize that the nights before Christmas and New Years were so similar. As tradition goes, fresh-water fish are traditionally gathered up from cities and towns who have access to nearby lakes or rivers, then sold over the holiday season for feasting on such special occasions. Such carp craze can be witnessed in Prairie du Chien, Wisconsin. Every New Year's Eve a large, locally caught carp from the Mississippi River is lowered into a throne as the New Year approaches and followed by fireworks (another reason I love Wisconsin).  But why carp? Perhaps its the belief that this strong fish provides strength to those who eat of it, as ancient Chinese stories describe. Whatever the reason, I'm thankful for an excuse to try my first hand at a homemade fish fry. Plus, what an excellent accompaniment to champagne! 


Until next year... !

Slovakian Deep-Fried Carp
From "Slovakian Cuisine" cookbook
Serves 6-8

8 pieces of carp
1/4 cup lemon juice
1 teaspoon salt
1/2 cup all-purpose flour
2 eggs, slightly beaten
1/2 bread crumbs
1/2 cup oil, canola or extra light olive oil
Garnishes: Lemon slices, fresh parsley

Season the carp with salt and sprinkle with lemon juice. Coat the fish with flour, then dip into eggs, and finally dip into bread crumbs. Fry fish slowly in heated oil until they turn pink. Place the fired pieces on a paper towel to soak up the excess oil. Serve with a potato salad garnished with lemon slices and fresh parsley leaves.

Slovakian Potato Salad
From "Slovakian Cuisine" cookbook
Serves 6-8

6 russet potatoes (about 1.5 lbs)
1/2 onion
2 stalks celery
2 whole carrots, peeled, diced
1/4 cup sweet peas
2 eggs, boiled, peeled, diced
1/4 cup relish, or diced gherkins
1 cup mayonnaise (can substitute 1/2 cup for sour cream)
3 teaspoons mustard
Salt and pepper to taste
2 Tbsp. pimento (optional)

Sweet and sour dressing:
1 cup water
1 Tbsp. granulated sugar
1/4 cup white vinegar
Pinch of black pepper

Wash and boil potatoes in salted water until tender (about 30 minutes). Peel and chop the potatoes, placing them into a large mixing bowl. Whisk together ingredients listed under "sweet and sour dressing" in a medium bowl. Steam the onion and celery until slightly soft, then slice into small pieces and place into the dressing until cool. Drain the onions and celery, discarding the dressing. Steam the carrots and sweet peas and allow them to cool. Combine all ingredients with the potatoes and mix well. Add additional sugar, lemon juice, salt and pepper to taste.  Note: For a simple variation, simply use potatoes, eggs, relish, and mayo. 

Slovakian Potato Salad served with a side
of American BBQ and beer.
Summer 2011.

Saturday, December 24, 2011

Merry Christmas


Happy Holidays from the Rockies.
May your days be merry and bright!


With love,
Emily & Joe

The Everlasting Opekance Tradition

This is the first Christmas that Joe and I will share together!  In the past, we would split ways to travel home to our families, only to phone each other during rare downtime between football and Christmas roast. I always loved discussing the similarities and differences between the traditions our two families honor for this special holiday.  For instance, my family opens gifts on Christmas day, where as his family opens gifts on Christmas Eve; my family decorates and displays an evergreen tree weeks before Christmas, whereas his family enjoys their tree for the first time on Christmas Eve; my family enjoys typical American comfort foods, while his family enjoys wonderful Slovakian dishes and sweets.  As one can imagine, this year marks the first year of a new family tradition.  A Christmas celebration that joins two sets of traditions!  Our plans are this:

Christmas Eve: Have a quiet celebration, just the two of us, in Denver. This includes attending Christmas Mass at 6:00 PM, followed by a simple seafood chowder (my family's tradition) and gift unwrapping (his family's tradition). 

Christmas Day: Navigate the holiday crowds at the airport to fly into Minneapolis to meet my family around 10:00 AM, where more gift exchanging and feasting will occur.  Our time in the Upper Midwest will conclude after we drive to Necedah, Wisconsin to have second celebration with Joe's family!

I left out one very special tradition, however.  This tradition has been passed down from Joe's father's family for generations:  Opekance, otherwise known as Slovakian Poppy Seed Dumplings.  Joe's mother, Zela, adopted this tradition as a means of joining her new husband's Christmas traditions with her own.  Now I am doing the same! These special dumplings are prepared to accompany Christmas Eve dinner, which is typically fried fish and potato salad.  Joe has always spoken of these dumplings with great enthusiasm. Now, I am so grateful to be able to keep such a special tradition alive for years to come. 


Serve with a glass of milk or plum brandy!

Opekance (Slovakian Poppy Seed Dumplings)
Compliments of Zela Lazar (Joe's mother)
Serves 8


Leaven:
50 ml water, warm
2 Tbsp. yeast
1 teaspoon powdered sugar

Dough:
4 cups (500 g) flour
2 Tbsp. granulated sugar
Pinch of salt
2 eggs, slightly beaten
150 ml milk
2 Tbsp. butter, melted

Sweet Syrup:
2 cups water
3 Tbsp. honey
1 teaspoon butter
1 can (12.5 ounces) poppy seed pie/pastry filling


First prepare classic yeast bread dough by combining all of the ingredients under "leaven" to make prepare the yeast. Set aside for about 5 minutes to check to make sure that the yeast is alive (foam should form).  In a large mixing bowl, whisk together  the salt, sugar, eggs, lukewarm milk and butter. Then mix in the leaven, and finally begin adding the flour until a soft dough is formed. Knead for 3 minutes and then flip into a slightly greased bowl, cover in a warm place and allow to rise about 1 hour (or until dough has doubled in size).  Divide into 3 in balls, and roll into logs as long as your baking sheet (about 15 inches long and 1 inch wide). Place logs onto greased baking sheet and allow to rise for about 20 minutes. Cut logs with a knife into 1-inch dumplings (without cutting them completely through!) and bake 15-18 minutes at 350 degrees Fahrenheit.  Let cool, then break the logs into individual dumplings. Allow to dry out for a few days (see note below), then place into a large bowl. See pictures below for details.

Prepare the sweet syrup by bringing the water to a boil and then adding the honey and butter. Pour this hot syrup over the dumplings and let stand for 2-3 minutes. Finally, add the canned poppy seed filling and slightly mix everything together. If the dumplings are still too hard, add more water to it. Serve immediately!

Note: Prepare the bread 5-7 days before Christmas Eve. This will allow the bread to dry out a bit so that they won't be too mushy after adding the sweet syrup.  That way, when it comes time to serve, simply prepare the sweet sauce and combine!


Dry dough dumplings soaked with simple syrup and
topped off with the special ingredient...
sweet poppy seeds!

Thursday, December 22, 2011

Cheery Cherry Cookies

The whole city of Denver is presently dressed in millions of colorful holiday lights. The sparkling bulbs most definitely add some cheer to downtown's skyline. We recently visited Skyline Park just off of the 16th Street Mall for a fun evening of ice skating! 


Colorful Christmas cookies also lend an abundance of cheer to warm gatherings on cold nights during the holiday season.  This happy holiday spirit prompted me to prepare Cheery Cherry Cookies.  I was so happy with the way these cookies turned out that I made another batch for a cookie exchange party. If you are looking for a new and crowd pleasing celebratory cookie, look no further. Just make these!  

Cheery Cherry Cookies

These cookies are super easy to make. No fuss with rolling out dough or cleaning up run away frosting.  Just prepare a pretty pink batter, add chopped maraschino cherries, bake, and finally top with a Hershey's Kiss hat. Consider mixing yourself a cherry garnished old-fashioned and rockin' out to some Christmas tunes while you bake away!

Butter, sugar, almond extract, milk and flour.
Add a splash of cherry juice and a few drops of red food
coloring to get this cheery cherry pink.
Drain and reserve the juice from your cherries.
Add cheer.
Bake.  
Eat!

The adorable pink complexion of these cookies almost reminds me of rosy cheeks acquired from playing out in the cold winter weather!  Cheers!

Cheery Cherry Cookies
Makes 48 cookies

1 cup powdered sugar
1 cup (2 sticks) butter, softened 
2 Tbsp. Maraschino cherry liquid
1/2 teaspoon almond extract
4 drops red food coloring
2 1/4 cups all-purpose flour
1/2 teaspoon salt
1/2 cup Maraschino cherries, drained, chopped
Hershey's Kisses, milk chocolate

Beat together sugar, butter, cherry liquid, almond extract, and food coloring. Mix in flour in small batches to make a smooth, soft dough. Stir in the chopped cherries, then shape into small, 1-inch balls. Place onto un-greased baking sheets and bake for 8-10 minutes. Remove from oven and place a Hershey's Kiss on top of each cookie immediately, while cookies are still soft and warm.