Saturday, January 21, 2012

Winter Marble Cake

Joe and I hosted our first-ever dinner party!  We both reflected on the fact that this meal marked the first time our table was at full capacity, which was not difficult to do since it seats only four.  I decided to prepare a few of my favorite simple Italian dishes that I encountered during my summer Italian cooking challenge. As many hosts strive to do, I wanted to prepare something elegant while at the same time remaining secretly fuss-free.  The menu was as follows:

Simple Potato Salad
Hot rolls
Pumpkin Chocolate Marble Cake

Making hosting look easy.

Besides cooking and cleaning, I needed some additional time to make sure our apartment was baby proof!  As it turns out, babies that crawl are quite the magnets to all electrical outlets and hidden cords. Even after we taped up cords and scattered toys across the carpet, the four adults took rotating shifts chasing around our animated 1-year old visitor, Levi. It wasn't until dessert when we could all finally remain at the table without worry. This was because Levi suddenly fell captivated by an unsuspecting baby decoy:  the large plastic lid of my cake Tupperware!  We could barely stomach our cake without spitting into giggles as we all observed him push the lid across the carpet, poke at it, attempt to make it roll or simply be in its company. In a way, this dessert truly succeeded in slicing up smiles, as well as compliments!  


Chocolate Pumpkin Marble Cake:
a guaranteed crowd pleaser!

The true chef deserving of praise for this bi-flavor pound cake is my mother. She baked this cake as a festive Christmas dessert when Joe and I were in Minnesota this past holiday season. She passed the recipe onto me and the rest is history!  Winter seems to be gaining strength in much of the Midwest. If you want to bring warm smiles to your dinner table for two or many, I highly recommend this as a final course.  Below I am sharing a modified version of the recipe that I consider to be far better than the original. I substituted fresh pumpkin for canned. If you do so as well, I recommend simmering your fresh pumpkin puree over low heat for about an hour to thicken. And, of course, try my mother's famously elegant (but secretly simple) rich chocolate glaze.  


Chocolate Pumpkin Marble Cake 
Adapted from "My Recipes" website

1 1/2 cups butter, room temperature
3 cups sugar
6 eggs
2 teaspoons vanilla
1 1/4 cups canned pumpkin (or cooked fresh shown below)
2 3/4 cups all-purpose flour (substituting 1 3/4 cups for whole wheat, optional)
2 teaspoons baking powder
1 teaspoon salt
1 teaspoon ground cinnamon
1/2 teaspoon nutmeg
3/4 cup unsweentened cocoa powder
1 cup milk, whole preferred

  1. In a large bowl, with a mixer on medium speed, beat butter and sugar until well blended. Add eggs, one at a time, beating well after each addition. Beat in vanilla. Scrape half the mixture into another bowl.
  2. To make pumpkin batter: Beat pumpkin into half the butter mixture until well blended. In another bowl, stir together 1 3/4 cups flour (whole wheat if using), 1 teaspoon baking powder, 1/2 teaspoon salt, cinnamon, nutmeg, and cloves. Add flour mixture to pumpkin mixture and beat on low speed or fold in with a flexible spatula just until blended.
  3. To make chocolate batter: In another bowl, mix remaining 1 cup flour, 1 teaspoon baking powder, 1/2 teaspoon salt, and the cocoa. Add flour mixture alternately with the buttermilk to the other half of the butter mixture (starting and ending with flour mixture), beating after each addition just until blended.
  4. Spoon half the pumpkin batter into a buttered and floured 12-cup bundt-cake pan. Drop half the chocolate batter by spoonfuls over (but not entirely covering) the pumpkin batter. Repeat to spoon remaining pumpkin and chocolate batters into pan. Gently run the blade of a butter knife around the center of the pan several times, then draw the knife across the width of the pan in 10 to 12 places to swirl batters.  See pictures below!
  5. Bake in a 350° until a wood skewer/toothpick inserted into center of cake comes out with a few moist crumbs attached, 55 to 60 minutes. Let cake cool 10 minutes in pan, then invert onto a rack, lift off pan, and cool cake completely.  Pour warm chocolate glaze (recipe below) over the top of the cake, letting it drip down the sides. 

Marvelous marbling!


Easy Chocolate Glaze 
Connie Nuss (my mother)

3 Tbsp. butter
3 Tbsp. corn syrup
3 Tbso. semi sweet chocolate

Place chocolate into a microwave safe bowl and heat until melted (30 seconds, stir, 30 seconds, repeat). Stir in the corn syrup and butter until well mixed and smooth (add additional 30 second sessions of cook time as needed).  Pour over desired cake or dessert while hot. 

Wednesday, January 18, 2012

Blizzard BBQ

Colorado is about to get hit by a massive winter storm that is predicted to tear through Vail Pass and Summit Valley over the next two days. With snow and wind gusts over 100 miles per hour (really!), I feel lucky to be in Denver where the weather will remain in the 50's and snowless. Nevertheless, Colorado has been in dire need of snow so I decided to celebrate the storm by firin' up my trusty crock pot for some winter-worthy, slow-cooked Bar-B-Que.  Steadfast cravings of my inner cowgirl... 

Witchita Falls, Texas.
Second grade (me), ready for the rodeo.
Slow-Cooked BBQ Pulled Pork,
(sandwich style).

Never before did I realize that pulled pork (a true favorite of mine) was so easy to prepare at home, and on a busy weeknight at that!  This recipe required only THREE ingredients with minimal prep. Simply place a pork roast in your handy dandy crock pot. Shake salt and pepper generously over the top and cover with the lid. Let it cook away while you are at work and when you return home from your busy day, your pork roast will be tender and falling off the bone.


Shred, shred, shred!


Pour on your favorite BBQ sauce to taste. 

My absolute favorite sauce in the world.
Must purchase within Kansas state boarders
or off of some other schmuck that's selling
bottle for profit (like me)!

Leave your spurs by the door and dish up a generous serving of pork over a few slices of white Texas Toast or Wonder Bread to soak up all of the saucy juices (we used buttered, crusty sourdough for lack of the others).  

Yeehaw!


Slow-Cooked Pulled Pork 
Serves 4

3 lbs. pork roast
Salt and pepper
Your favorite BBQ sauce

Place pork roast into crock pot with fattiest side up. Season well with salt and pepper. Place lid on top and cook on low heat setting for 8-10 hours, or high heat setting for 5-6 hours. Try not to remove the lid (it will release all of the heat and extend your cooking time). When meat is falling off of the bone and cooked through, shred, then mix in BBQ sauce to your liking. Serve with white bread and coleslaw. 


Monday, January 16, 2012

Slovakian Halushky Dumplings with Bryndza

Introducing Bryndza...


This little block of traditional Eastern European sheep's milk cheese traveled from Slovakia to Wisconsin to Colorado where it was finally consumed!  (I know what you're thinking and don't worry. It has been in the freezer the entire time to keep it fresh).   I cannot believe how long it has taken me to finally glorify this unique cheese. But, I have been waiting for the right time. A time when I could make a specific Slovakian dish. A dish that goes back generations. A dish called, Halushky with Bryndza.  

Halusky with Bryndza,
a Slovakian favorite!

I have eaten this dish only once before, at the dinner table of Joe's family. That was nearly five years ago, back when Joe and I were only college sweethearts. Around that time I remember thinking that Joe had this peculiar cheese shredder in his apartment kitchen that was never used. Turns out, five years later, I have finally figured out the tool's true identity. It wasn't a cheese shredder, but a European dumpling sieve!  An essential tool for making Halusky dumplings!  

I referenced my Slovakian cookbook for my Haluski recipe, but half way through my dumpling preparation I decided to call Joe's mother for a cooking consultation! I couldn't have made this dish without her, and have included her advice in the recipe below.  

This dish starts off with the making of basic Haluski dumplings made of starch, flour, egg, and salt. For this particular recipe, I used potatoes as my starch, but flour is much faster and easier to use.  My handy dandy food processor made the potato preparation very effortless... 


After the potatoes where peeled, shredded and pureed, a dough was made by adding flour, egg and salt and mixing well. A lumpy, thick dough was formed. I would say it was about the consistency of runny oatmeal. This consistency is very important. Not too thick or too runny. In other words, it should be able to easily fall through the holes in the dumpling sieve via gravity and not force. 


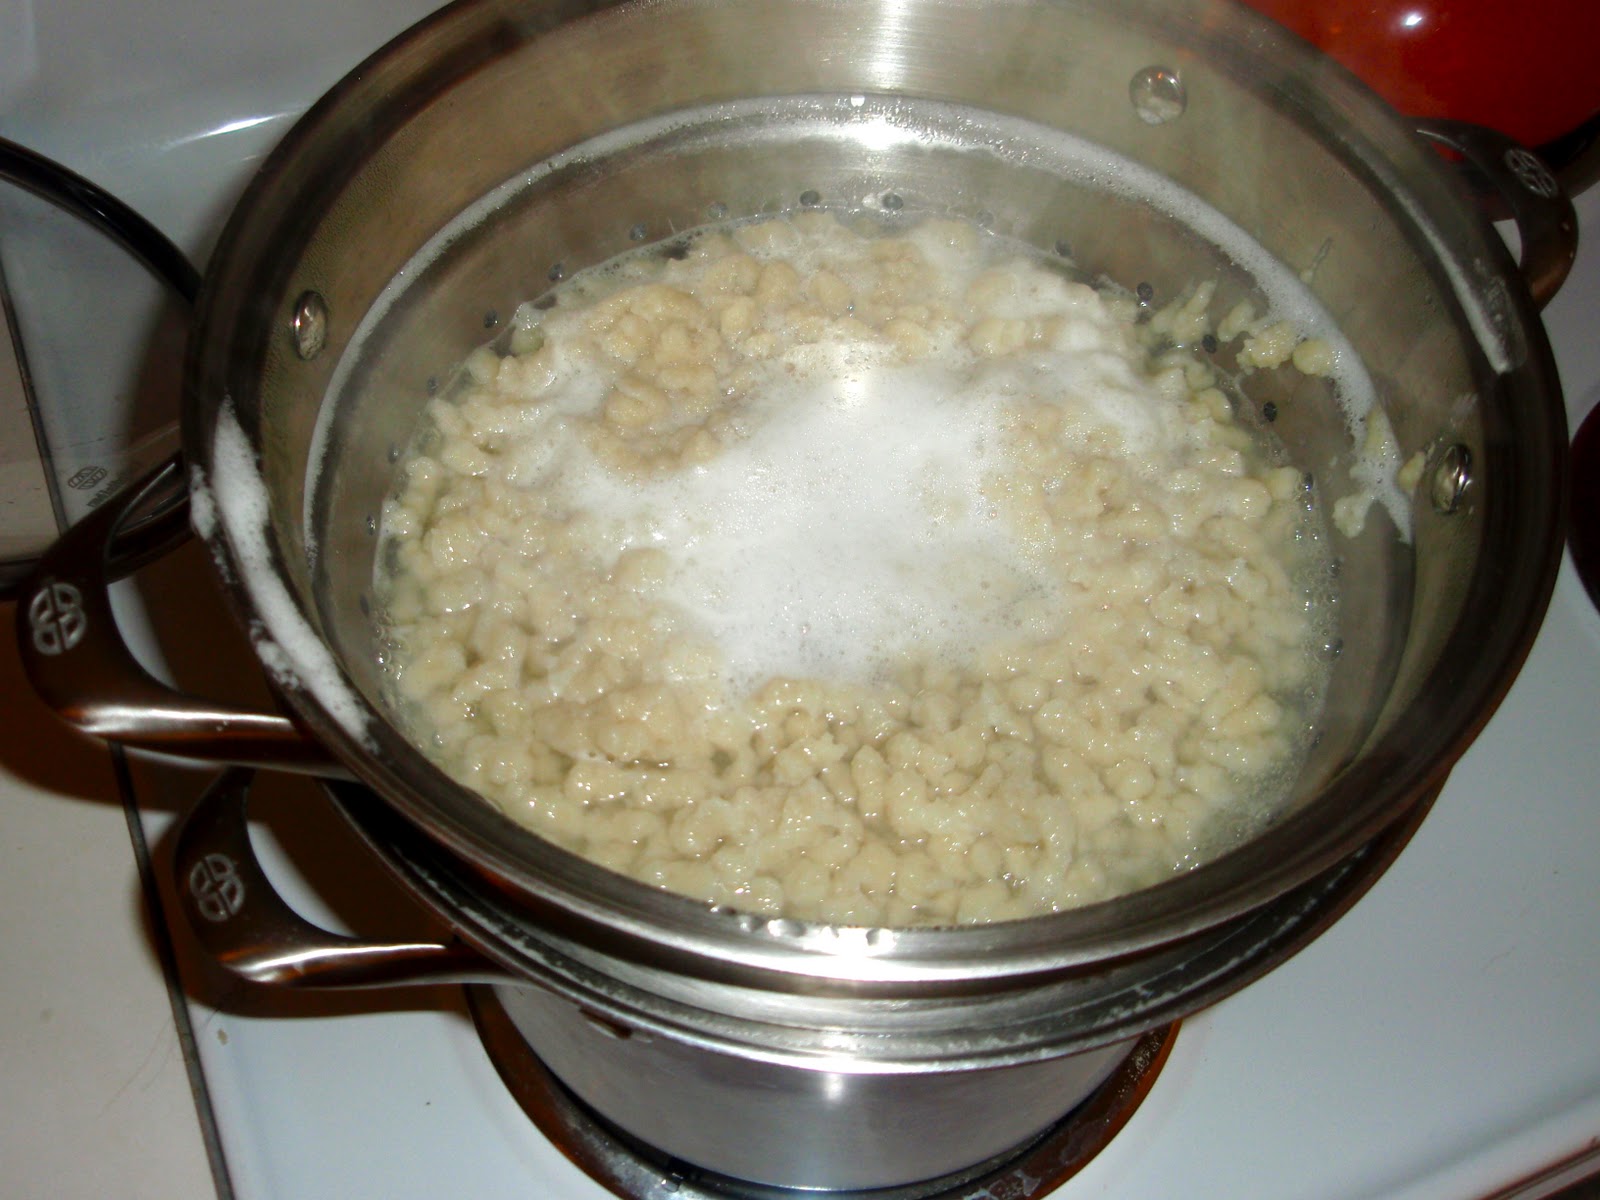
Once you have your starchy dough, bring some salted water to a boil. This is where the special dumpling sieve comes into play. Balance it over the top of your boiling water pot with the dough slider on top. This is what it looks like:


Now pour your dough into the sliding box and glide the box back and forth to get the dough to drop through the holes into the boiling water. Once all of the dough is added, let the dumplings boil until they float to the surface of the water. Then let them boil an additional few minutes before draining and rinsing with water. 

Plain Haluski Dumplings!

Now comes the fun part! Mix up the some Bryndza cheese with a bit of sour cream to get it smooth and creamy. Cream cheese can be substituted for Bryndza if you don't happen to know someone who makes regular trips to Slovakia (hehe).  Stir the cheese mixture into the hot dumplings. Then, fry up some bacon in a pan. Remove the bacon and crumble it. To serve, top each helping of cheesy Haluski with a hearty helping of bacon pieces and sliced green onions.  Finally, drizzle with some reserved, hot bacon grease and many shakes of salt... oh, yes, those toppings are required!   This dish is guaranteed to be the most memorable, hearty plate of European comfort food you'll ever encounter!

Haluski with Bryndza is traditionally served with
buttermilk, whole milk (shown here), or plum brandy. 

Slovakian Halushky Dumplings with Bryndza 
From "Slovak Cuisine" cookbook
Serves 8

5 russet potatoes, washed and peeled
1 cup all-purpose flour
1 egg
200 g block Bryndza cheese, or 4 oz (1/2 block) full-fat cream cheese
1/4 to 1/2 cup sour cream
5 strips of bacon, cooked and crumbled (grease reserved), for garnish
Green onions, sliced, for garnish
Salt to taste

Using a food processor, shred and puree potatoes. Put potatoes into a large bowl, then mix in flour, egg, and about 1 tablespoon salt. This dough should be about the consistency of runny oatmeal. Bring salted water to boil in a large pot. Using a special European dumpling colander, pour the dough into the slider to drop dumplings into the hot water to cook. Dumplings should rise to the surface of the water once they are cooked. After they begin to float, let them cook an additional 3-5 minutes before draining and rinsing under running water. Place dumplings into a large bowl.  Now, prepare the cheese mixture by mixing Bryndza (or cream cheese) and sour cream. Stir the cheese mixture into the hot dumplings. Fry up the bacon in a large frying pan until crispy. Remove the bacon and crumble, making sure to reserve the grease.  To serve, place cheesy dumplings on a plate, add crumbled bacon, green onions, and a drizzle of bacon grease. Sprinkle generously with salt. Best when eaten immediately!
Note: If you don't have this special colander, use a knife and a cutting board to toss the pieces in. 

Saturday, January 7, 2012

Linger

Having friends from far away places come to visit makes me all warm and fuzzy inside.  Our most recent congenial visitor was Bob, from Madison, Wisconsin.  Being one of Joe's good friends from Medical School, we wanted to show him around our new city. One of our stops included an adventurous dinner at a trendy eatery in the Denver Highlands neighborhood. I guess you could say we literally "Linger-ed"with great company and multiple small plates of international, gourmet street food. 


We ordered plate, after plate, after plate of intriguing dishes off of their menu. My favorite were the Strongbow Cider Steamed Mussels! 


Then, stuffed ourselves silly...


We were so filled with food by the end of the night that we couldn't even find extra room for Little Man's Ice Cream, which is located just next door (in the picture above to the left).  Nevertheless, we left full of memories.


Friday, January 6, 2012

Rebel Brandy Balls

Oh, the simple signs of January....


We were pretty proud of our little tree for lasting all the way until the New Year. Can't say our Christmas cookies lasted much longer either. In fact, I think the tree and the cookies disappeared with 2011...

Our beloved stash of holiday treats!

You probably recognize the pink cookies on the left Hershey's kisses hats, but I also want to share another of my cookie exchange contributions. A cookie rebel...  Sour Cherry Chocolate Balls, in the lower right hand corner.  I found this recipe within my Slovakian cookbook's New Year's section so they doubled their holiday duty as a Christmas treat this year.  The recipe called for "preserved sour cherries," however, I used something more special:  homemade Brandied Cherries that have been marinating to sweet drunken perfection since summer! 

Brandied Cherries, aged 6 months.

This recipe requires no baking and few ingredients, but the end result is quite elegant! I especially like how the coconut coating resembles snow. Even though the holidays have come and gone, who doesn't like a sweet memory? In addition, with so little snow fall this year across the nation, perhaps we should start marinating some Brandied Cherries now in order to prepare these Sour Cherry Chocolate Balls as a celebratory treat when the snow finally does come later this spring (fingers are crossed)!

Slovakian Sour Cherry Chocolate Balls

Sour Cherry Chocolate Balls
From "Slovak Cuisine" cookbook
Makes about 2 dozen

1/2 cup granulated sugar
4 Tbsp. water
3.5 oz (3.5 squares) semi-sweet bakers chocolate
1 cup ground walnuts
2 Tbsp. rum
Preserved sour cherries, or Brandied Cherries (recipe below)
Shredded coconut

Pour water over sugar and bring to a boil in a small sauce pan, stirring constantly. Turn off heat and then mix in chocolate, walnuts and rum. Tear off a small bit of this chocolate-nut base, indent with your thumb, and top with sour/brandied cherry. Shape it into a small ball and then roll it in the coconut. Place in mini paper cups. Note: If chocolate mixture is too wet to shape, add additional nuts or perhaps a spoonful of all purpose flour. 

Chocolate-nut base.

Brandied Cherries
Yield varies

1 jar with lid, washed and sterilized
Dried, sweetened cherries (cherry-flavored "Crasins" work too)
Brandy of choice

Simply fill your jar 3/4 full with dried cherries. Then pour brandy over the cherries, making sure that the tops of the cherries are covered. Shake 5 times and let marinade in your liquor cabinet for at least 3 months (the longer it marinates the better the flavors that will develop).  Give your jar a good shake every few weeks.  Note: Cherries will expand as they absorb the brandy. You may have to add additional brandy to keep the tops of the cherries covered. Also, the liquid will become a bit cloudy. This is normal but will be less if you refrigerate your jar after the 3 months mark. 


Enjoy the cherries over ice cream and pour the liquid into
cocktails or beer for a tasty twist on happy hour! 

Tuesday, January 3, 2012

Slovakian Cabbage Pasta Squares

In the weeks leading up to the holidays, I wouldn't get my hands off of my Slovakian cookbook. Second to my mother-in-law, Zela, this cookbook is an inspirational Bohemian reference on new ways to prepare traditional Slovakian foods. I began cooking Slovakian foods because I felt more connected to Joe's family's heritage. The more I prepare Slovakian cuisine, however, I realize that I'm hooked on it for other reasons as well:

Slovak Cuisine, Copyright 2010
ISBN 978-80-07-01817-1
1) It is affordable. 
Potatoes, cabbage, onions, flour, eggs, pork... these are main staples and are usually priced at a bargain. Ingredients steam from what Slovakian people could grow in their fields, bred in their yards, and what they were able to catch or collect in nearby meadows and forests. I still splurge on higher quality cheeses, all-natural sausages, and mostly organic produce, but my grocery bill is still down 50%! 
2) It is fast. 
With a little foresight, dinner can be on the table in 30 minutes tops. Frying and boiling cook everything quicker than you can ring the dinner bell. This is very handy for a cook on the go.
3) It is truly delicious. 
Anyone who is curious about it, please come over and share a meal with me. Or even better yet, click on the label listed as "Slovakian" on the right hand side of this page for an ongoing listing of recipes for you to prepare at home! 

Cabbage Pasta Squares

Here I will show you how to make homemade pasta squares tossed with cooked cabbage. I had always thought that making pasta required expensive spaghetti presses and whatnot. But no. All a person needs is some counter space and a knife! Marvelous.


Prepare a simple dough of flour, egg, water and salt. Thinly roll out the dough on a floured surface and let it sit for a few hours to "dry" slightly. Cut into squares and then boil in salted water. You know your pasta is cooked when it floats to the top!


Drain and rinse your cooked pasta under running water.  Then toss with some butter or oil to keep the pieces from sticking. Sauté some shredded cabbage in a bit of oil with salt and pepper while the pasta is cooking until soft. Toss everything together and dig in! 

Served with a hearty winter salad and olives,
but this would probably also go very well with
a smoked sausages plate.

Slovakian Cabbage Pasta Squares
From "Slovak Cuisine" cookbook
Serves 8

4 cups all-purpose flour
1 egg
1 teaspoon salt
1 cup water
4 Tbsp. butter
4 Tbsp. oil
1 small head of green cabbage, shredded
Salt and pepper to taste

Combine the flour, egg, salt and water to work into a dough. Roll out onto a floured surface and let dry for an hour or two. Meanwhile, cook the cabbage by heating the oil up in a large skillet. Saute the cabbage until soft. Season with salt and pepper. Cut the slightly dried pasta into small squares and toss into salted boiling water. Once the pasta floats to the top, let cook an additional 3 minutes. Drain and rinse pasta under running water. In a large bowl toss with the butter. Add the cooked cabbage and mix well. Season with additional salt and pepper to taste. 

Note: Need a way to use up leftovers?  Try tossing with a simple Alfredo or marinara sauce. Or try combining with other leftovers. We enjoyed ours with some shredded turkey and white gravy!

Getting creative with leftovers!

Sunday, January 1, 2012

2012 Resolutions

Today marks the start of another new year. A fresh start. The first of 365 days that lay ahead to divide and conquer. To fill with happy memories and perhaps a few regrets. Nonetheless, we all charge ahead with hearts full of optimism!  

This morning as we stir from our slumber and groggily fumble for some coffee, many of us are probably thinking about resolutions (you know, like never to guzzle a bottle of Andre... ever again).  Personally, I get all excited pondering ideas for how to become a "better me" this time of year.  In the past I've usually settled for things that I know will get me out of my comfort zone, like learning how to wake board or run a marathon... all of which never ever actualize. So I'm trying something new this year. I'm challenging myself and Joe to fulfill our duties in Colorado as adventurous, rough n' tumble, wild-west residents. Or in other words, complete a list of tangible expectations before the end of June.


Colorado Must-Do List:
Compiled June 2011

As with any list, one can lose sleep over trying to make it as comprehensive as possible. However, I rest easy knowing that there are many great things included, as well as many others that were (and will be) accomplished in addition.  In 2012, I wish to use this list as a compass to motivate Joe and I to continue appreciating all that this beautiful state has to offer. We are so blessed to have so many new and exciting adventures within reach.  

With that, I say best of luck to those of you with lofty New Year's resolutions! May they challenge you to step out of your comfort zone, to enjoy the outdoors, and to tempt your inner spirit of adventure.

Happy 2012!