Showing posts with label eggs. Show all posts

Sunday, November 6, 2011

"I Like Pie" Pie

Blurting out "I like pie," with a high-pitched tone and a goofy grin has become a bit of family joke over the years. The phrase is referencing a Mystery Science Theatre episode dubbing over "Time Chasers"(click here and fast forward to the time 5:14 to see).  Somehow this joke continues to make me giggle, although I'm still not completely sure I understand why...  

Because in truth, I really do like pie!  


Goofy smile in tact, I want to share with you a pie recipe that I recently made.  I hope that I can encourage other pie enthusiasts out there (you know you are one of them!) to try swapping sugary fillings for herbed-veggies and cheese, thus giving the beloved stuffed-crust delicacy a deserved place at the dining table, in addition to dessert. 

As we all know, a perfect pie starts with perfect crust. This recipe called for cream cheese as a main ingredient, with no eggs.  I was curious to see what the texture would turn out like, and to my surprise, I couldn't tell the difference from other butter and egg heavy crust recipes.  The cream cheese produced moist and pliable dough, with a baked finish that was golden and flaky.  I had to delicately roll out my crust to an extremely thinness to cover my pan's surfaces, so I would encourage you to make a bit extra to prevent handling such paper-thin pieces of dough.  Plus, who doesn't love extra dough to nibble on?  Note: My favorite thing to do to use up extra dough trimmings is to recombine them to make small pockets stuffed with jam and dusted with sugar. Just remember to take them out of the oven after about 15 minutes... such a treat to snack on while waiting for its bigger pie part to finish baking!

Matching dough bowl and lid.

While the crust is refrigerating, start preparing the filling. Cooked cabbage seasoned with herbs is so versatile. Add whatever spices entice you at the moment, fresh or dried. The recipe (seen below) called for dill, which I did not have, so I substituted more basil. I can also imagine playing with different combinations of cheeses and veggies. For example, mushrooms can be substituted for carrots and spinach for cabbage... or try purple cabbage or onions for color enhancement. Boiled eggs not only add a quality protein source, but a beautiful stratification of colors to the taster.


Assembling the pie with a layer of crust, then a layer of 1/2 block cream cheese, seasonings, sliced boiled eggs, cooked veggies, and more seasonings.  Don't be shy with salt and pepper either!  Fix the lid by kneading the edges together and cut a few lines into the top of the crust to allow an escape for steam.  Your savory pie is now oven-ready.

For an extra BANG, brush the top of your crust with a bit of
beaten egg and sprinkling of sea salt. 
Once the baking timer goes off, allow your pie to cool slightly before cutting in. Once you do, I think you will be pleasantly surprised at how wonderful pie can be as a savory dish.  It may be a bit of a surprise to fellow tasters when the severed crust reveals cabbage and carrots!  However, after a slice or two,  everyone will be beaming, "I like pie" for dinner too!


"I Like Pie" Pie
Adapted from "The Vegetarian Epicure"
Serves 4-6

Crust:
1 1/4 cups all-purpose flour
1 teaspoon sugar
1 teaspoon salt
4 oz. softened cream cheese
3 Tbsp. butter

Filling:
1/2 head cabbage, shredded
2 carrots, thinly sliced
1 yellow onion, thinly sliced or chopped
1 Tbsp. dried basil
1/4 teaspoon dried marjoram
1/2 teaspoon dried tarragon
1/2 Tbsp. salt
1 teaspoon black pepper
3 Tbsp. butter or oil
4 oz. cream cheese
4-5 boiled eggs, sliced

Make the crust by sifting together the dry ingredients, cutting in the cold butter and working it together with the softened cream cheese. Roll out 2/3 of the pastry and line a 9-inch pie dish or baking pan, leaving at least 1/2 inch to hang over the edges. Roll out the remaining crust to make a circle large enough to cover the dish. Chill for at least 20 minutes.

Wash and cut the vegetables as specified above. In a large skillet, melt about 2 Tbsp. butter. Add the onion, cabbage, and carrots. Saute over medium heat several minutes until softened, stirring occasionally to prevent sticking and burning. Add seasonings, adjusting salt and pepper as desired, stirring to mix well. When the cabbage is soft wilted and soft, remove from heat and set aside.

Remove crust from the refrigerator. Spread the remaining cream cheese to cover the bottom of the pie shell.  Arrange the boiled egg slices over the cheese. Sprinkle them more spices if desired. Cover with cooked cabbage mixture. Season with salt and pepper to taste and cover with the remaining dough. Press the pastry together tightly at the edges (adding some neat fluting if you prefer)! Cut a few short slashes through the top crust.

Bake in a preheated 400 degree F oven for 15 minutes, then turn the heat down to 350 degrees and continue to bake for another 20-25 minutes, or until the curst is light brown.  Cool slightly before slicing.  Enjoy!

Note: If you want to see a traditional dessert pie that I recently made, click here.  So many possibilities for filling two layers of crust!

Baked Green Eggs

I have a real love of vegetables. Their various shapes, colors and textures are as beautiful to me as a bouquet of flowers.  Eating them is simply a bonus!  As a girl who grew up in the heart of Bar-B-Que country, Kansas City, meat often took the center stage at my family's dinner table. To this day I still appreciate a thick n' juicy pork chop and hearty slab of ribs, however, why not make meat take a backseat to vegetables, nuts, eggs, and cheese every once in a while?  From my observations, the term "vegetarian" often scares people away from choosing such recipes out of fear that all meatless dishes are bland and unsatisfying. Plus, let's be honest, no one delights in peeling carrots or washing heads of lettuce... 

However, I have a marvelous little book that sits proudly on my cookbook shelf next to larger, meatier neighbors:

By Anna Thomas, Copyright 1972
ISBN 0-394-71784-8

I purchased this cookbook from a garage sale for $1 while I was an undergrad in college. The author supports ideas of sustainable gardening, meal sharing, and most importantly, enjoyment of food as a way of eating.  This little book, as "vegetarian" as it is, breaks down prejudices about meatless eating. Vegetables can be scrumptious, filling, and embraced at the dinner table as the main course.  


For example, my husband and I loved this creamed-eggs dinner, which I am calling "baked green eggs" since it contains a decent amount of leafy greens. This is so simple and satisfying!  I made it a modern twist to the book's, Eggs Florentine recipe.  See my recipes below. 

Sauteed greens and mushrooms are the casserole base.

First, sauté your greens of choice (spinach or even mixed salad greens) in some olive oil. I added leftover mushrooms cooked with Italian herbs from a different recipe. You can basically sauté any vegetables you think might be nice. Next time I will probably add thinly sliced yellow onions. Your veggies, mostly green in color, act as the foundation to this dish.

Add eggs and cheese!

The second step is to create little craters using a spoon to nest four raw eggs into. As you can see, I didn't really follow the rules. I cracked five in there!  Also, any strong cheese will work instead of parmesan. I, personally, adore a block of quality aged, hard parmesan that I grate as needed.

The magic sauce... Béchamel!

Pour your pre-made Bechamel sauce all over those cute little eggs and your casserole is ready for the oven!  In just 20 minutes, the sauce will solidify and create a slight crust at the edges of the pan. As for the eggs, the whites will be solid but the yolks will ooze out as a delicate gravy when your fork slices through its layers. I recommend serving a loaf of warm, nutty bread as a spongy utensil to help soak up the eggs and cream.  As a side, I served additional fresh mixed greens topped with Italian-inspired Marinated White Beans. 


Cheers to the meatless meek! 

Baked Green Eggs 
Adapted from "The Vegetarian Epicure"
Serves 4

1 lb. fresh spinach or mixed greens
1/2 cup sauteed mushrooms (optional)
3 Tbsp. olive oil
4 eggs
Salt and pepper to taste
1 Tbsp. butter
4 Tbsp. grated parmesan
1 cup Béchamel Sauce (below)

Wash your greens, roll in a tea towel and gently shake to eliminate most of the water. Heat the olive oil in a large frying pan over low-medium heat. Add the green leaves, cover, and allow to cook for 5 minutes to wilt the leaves. Remove cover and stir so that all of the leaves are covered in the hot oil. Cook about 2 minutes more, season with salt and pepper and remove from heat. If you are adding mushrooms (optional) sauté the mushrooms before adding the greens to the pan. 

Lightly spray or butter a deep baking dish. Arrange the hot greens and mushrooms (optional), a little higher at the edges than in the middle. Using a spoon, create 4 small hollows within the greens. Distribute the 1 Tbsp. butter between the 4 hollows. Then, carefully break 1 egg into each hollow (4 total). Sprinkle the grated parmesan evenly over the eggs and greens, finishing with pouring the Béchamel Sauce over everything.

Bake in a preheated 350 degrees F oven for 15-20 minutes. Serve hot!


Green Egg Casserole

Basic Béchamel Sauce
Adapted from "The Vegetarian Epicure"
Makes about 1 cup

1 1/4 cup milk (whole is best)
1 1/2 Tbsp. butter
1 1/2 Tbsp. flour
1/4 onion (white or yellow), minced
1 teaspoon peppercorns (cracked or whole)
1 teaspoon dried thyme
1/2 dried bay leaf
Salt to taste
Pinch of ground nutmeg

In a small sauce pan, heat the butter until bubbly. Add the finely chopped onion and let cook over low heat for about 5 minutes. Stir in the flour and continue cooking a few minutes more. Then, add milk bit by bit and stir with a whisk while you do. The sauce will begin to thicken after a few minutes. Add the spices and let cook over low heat for about 15 minutes. Strain through a sieve. Once prepared, try to use within a few days, and if possible, immediately. Note: This sauce has many variations by substituting or adding different spices and cheeses. 


Bechamel Sauce

Marinated White Beans
Adapted from "The Vegetarian Epicure"
Serves 8

1 cup white beans (Cannellini, Great Northern, or Navy)
1/2 cup olive oil
1 bay leaf
2 whole cloves garlic
1 Tbsp. salt

Marinade:
1/2 cup olive oil
1/2 cup white wine vinegar
4 Tbsp. chopped fresh parsley (or 1 Tbsp. dried)
1/2 teaspoon dried crushed oregano
1/2 teaspoon dried crushed basil
1/2 teaspoon dried crushed tarragon
Salt and pepper to taste

Wash the beans and soak them overnight (or using soaking directions on the bag). Combine the beans in a pot of water, along with olive oil, garlic cloves, bay leaf, and salt. Bring to a boil and then turn heat down to a low simmer until they are tender but not mushy (about 1 1/2 to 2 hrs). While beans are cooking, prepare the marinade by whisking together all of the marinade ingredients in a medium sized mixing bowl. Once the beans are the desired tenderness, drain the beans and remove the bay leaf and garlic cloves. Mix the beans into the marinade, cover, and refrigerate overnight (at least 12 hrs).  Serve cold over salad or as a side dish to an Italian pasta dish.

Marinated Italian White Beans

Friday, October 21, 2011

Italy Part 29

I feel as though I'm rounding the last bend and speeding towards the finish line of my Italian cooking challenge. Since the beginning of the challenge in early June, I've been keeping track of the recipes using a word document saved to my desktop. Each week I open it up, map out the next Italian meals and dishes to be made, prepare a grocery list, and schedule blog posts.  Today, I opened up this document only to see one remaining recipe that has not been crossed out!  Just one!

However, let's save the balloons and ribbons until that final day comes. Besides,  I have some catching up to do with sharing some previously made recipes!  Let me share with you another elegant Italian cake called, Zuppa inglese (p. 142), aka "cold cake." Making this cake began with preparing the foundation: "Madeira cake." I wasn't exactly sure what this was, and of course, my local grocery stores don't carry any. Remembering back to the Madeira-infused Cassata all Siciliana cake from last month, I made the same sponge cake recipe drizzled generously with Madeira wine. 

The sponge cake fresh out of the bunt pan,
anticipating a shower of Madeira wine.
Cutting the cake into three separate layers. 

After the boozy cake base was ready, I made the custard filling.  In the past, the only homemade custard I have made involved following the directions on the back of a box of flan pudding.  Italian custard is bit more complicated. First, slowly heat a pan of milk containing a split vanilla bean. While the milk is heating, whisk egg yolks, flour and sugar to create a pale, creamy batter. Once bubbles begin to form on the sides of milk pan, add the egg yolk mixture to the milk and stir over medium heat until the custard boils. Continue to stir until it thickens.  

Left: Egg yolks, flour and sugar.
Right: Milk and vanilla bean.   
Stirring, stirring, stirring.
After about 30 minutes, the custard looked like this. 

Once the custard mixture had thickened, I removed the pan from the burner and allowed it to cool slightly.  During this time, I had to apply more alcohol to the Madeira cake. This time rum mixed with a little bit of water. I was surprised by how much liquid I was giving the cake, however, perhaps it was to prevent the cake from drinking up the custard (remember, this same sponge cake soaked up all of its whipped cream topping in the past). The final step was assembly: a layer of cake, a layer of custard, another layer of cake, another layer of custard... finishing with a layer of custard sprinkled with chocolate shavings and sliced slivered almonds.

Custard layers.
Notice that the hole from the bunt pan was filled in
with extra sponge cake cut from the bottom. 
Zuppa inglese, 
another elegant Italian dessert!

The hardest part of this recipe involved waiting the minimum three hours to allow the cake to refrigerate.  Once that timer goes off, grab a fork and sharpen your elbows. This cake so good it's worth fighting over. In fact, my husband and I finished this entire sweet-tiered masterpiece in two days!

Wednesday, October 19, 2011

Italy Part 28

Have you ever scratched your chin wondering whether to have an after dinner drink versus a sweet treat? Introducing,  Zabaglione (p. 140).  A dessert that allows you both... in one glass!  I realize that the past few entries have been quite lengthy, so here is a refreshingly short entry of a neat little Italian treat that requires only three ingredients and an electric mixer.

Zabaglione,
A wine mousse of sorts.

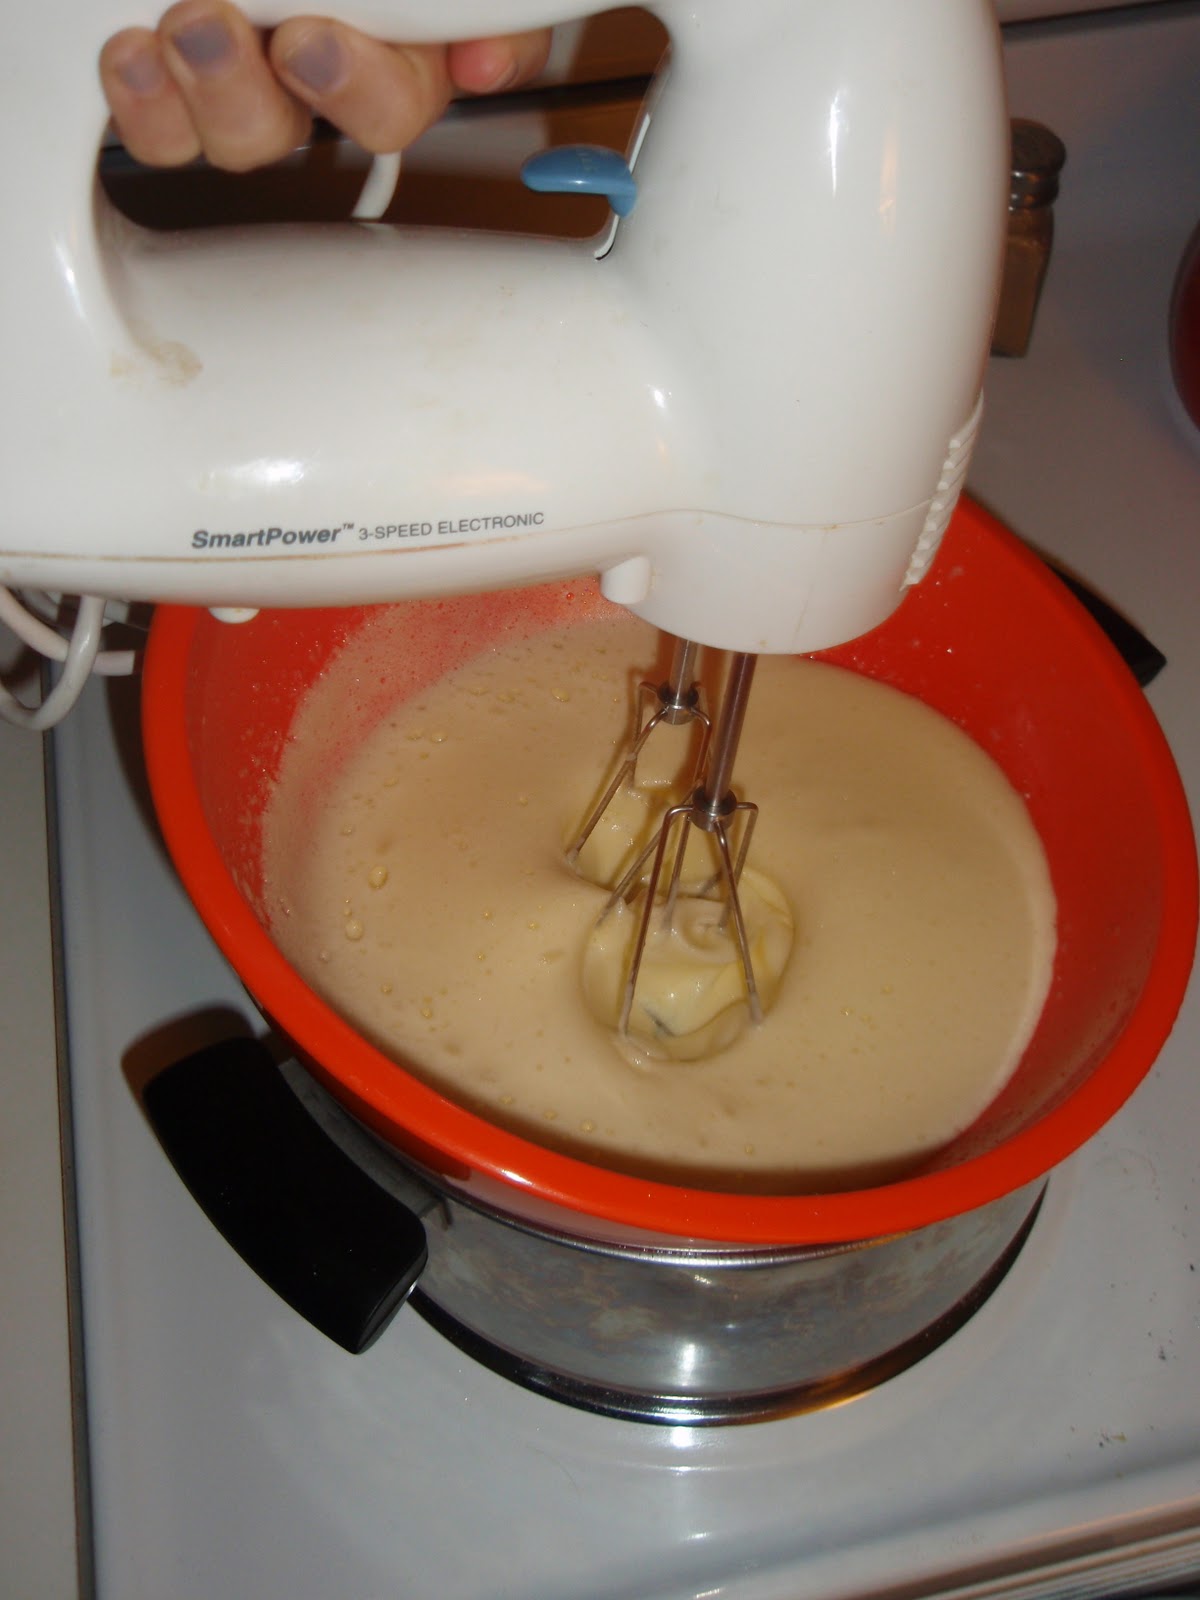
Simply combine 4 egg yolks, 1/3 cup sugar, and 1/3 Marsala wine with an electric mixer in a large bowl over a pot of simmering water until the mixture is smooth and foamy (nearly tripling in volume). That is it! The result is a creamy, mousse-like drink that you eat with a spoon.  Neat, eh?

Placing my ingredients over barely boiling water.
Mixing non-stop for about 5 minutes.
The mixture begins to grow before your eyes!
It makes about 4 cups.

I will note that you may want to consume immediately or within a few hours after making. I ate one fresh (pictured above) and it was perfect! Light and fluffy. Sweet and fruity. After a night in the refrigerator, the others had deflated into a half foam, half liquid mixture... not as appetizing... so grab a few friends before making so that you can finish the batch while it's fresh.  Tootles!

Thursday, September 15, 2011

Italy Part 21

Sicilians certainly do not cut corners when making cake! This was my conclusion after enduring a baking venture that took me three days to complete. This recipe would have normally taken two, however, I had to make my own sponge cake since my local grocery stores failed to supply any in the shape and size required. Other ingredients that I could not purchase included, cedro (a lemon-like citrus fruit), fruit glace (candied fruits in a glossy corn syrup coating), and blanched almonds (really)!  I did my best with substitutions. The following is my Cassata all Siciliana (p. 141) cake story...

Day 1: A cake for a cake
Preparing sponge cake is like cooking solid egg foam. It required making a sweet, citrus flour and egg yolk batter, followed by gentle folding into a giant bowl of whipped egg whites and sugar until the consistency resembled a frothy latte! Angel food cake has always been a favorite of mine, but now I think I found a competitor. 

Colonial Sponge Cake
From: "Better Homes and Gardens Heritage Cookbook"
Copyright 1975 
Inverting the pan for cooling.
Why am I always terrified the cake will plop right out?
This is what happens when you leave spongy, unguarded cake with me
(just ask my mother)!  Crispy undersides are just so irresistible, and
besides, who is going to notice the bottom of a cake after a good icing?

Day 2: Assembling the dessert puzzle 
Now that I had a sponge cake ready-homemade, it was time to prepare the filling and then assemble the whole cake together. Many steps were involved.  Ricotta cheese was the main ingredient and to add even more Italian flare, the sponge cake was sprinkled generously with dessert wine. 

I substituted whole, raw almonds for "blanched" since
I could not find them at the store and realized only
later that I could have probably taken off the almonds' brown
coats with a little extra elbow grease. Lessons for the future!
They required cutting into halves and dry-frying. 
My substitution for the real candied fruits (or glace) was to
purchase purely artificial ones. I used the yellow, orange, and red
pieces to substitute for cedro, orange glace, and cherry glace. 
This recipe takes "cheesecake" to a new level,
requiring nearly two pounds of fresh ricotta. Yum!
The filling ingredients are ready to mingle.
Ingredients: ricotta, candied fruits, almonds, pistachios,
icing sugar, vanilla, and grated lemon rind. 
The sponge cake required modifications via slicing,
reserving one complete, round piece for the filling "lid."
The rest of the cake was cut into various angled pieces
and assembled into a greased bowl as the cake's exterior. 
The cake mosaic after a shower of wine.
When I do this again, I would find a smaller, steeper bowl.
The recipe calls for a "pudding basin" but I used a mixing bowl.
Madeira, the dessert wine that was needed for the infusion.
Much like Port or Marsala, this sweet wine is fortified.
It gets its name from the origin of the grapes:
the Portuguese islands of Madeira.  
Stuffed. 
After the final placement of the reserved slab of sponge cake,
this assembled jigsaw must set in the fridge overnight.  

Day 3: Beautification and appreciation
After a night of beauty rest I was overly curious to take a peak. Much hesitation came when I realized that two days of hard work could be easily ruined with just one failed attempt to flip the heavy contents of the bowl onto a plate!  With a bit of pep talk and deep breathing, I flipped the bowl while struggling to hold the plate steady until I finally felt the anticipated PLOP! of the cake releasing from the sides of the bowl.  I was thrilled (thrilled!!) that it all came out in one piece. The final steps required covering up some blemished surfaces with whipped cream and a splash of color. What a beauty! Let's eat! 

Getting ready for the flip.
It survived with all of its pieces intact!
Ready for the cakewalk (... around my kitchen). 

This cake is truly divine! It may have taken three days to prepare from scratch, however, beauty transpires from the inside out. A feast for the eyes and taste buds! My favorite part has to be its colorful confetti filling- the smooth, sweet ricotta complements the crunchy nuts and chewy fruit pieces. Please note that the sponge cake is named as such for a reason. Comparing the last two photos, you will recognize how the whipped cream was taken right up by the cake in only a few hours, so I would suggest garnishing immediately before serving.  A piece (or two) is extra tasty with some additional Madeira or a splash of blush wine.

Friday, August 26, 2011

Playing with Fire

Last weekend, Team Lazar decided to embark on their first camping adventure. What better place than the quant wildflower capital of Colorado- Crested Butte!  On Friday afternoon with the Civic stuffed with camping supplies, fresh ice in the cooler, and big smiles on our faces we headed southwest. The 5-hr drive from Denver turns out to be incredibly scenic, as the highway often narrows to two lanes as it twists up and down mountains ranges, through the fertile valleys of cattle country, passing through three different national forests. We arrived in Crested Butte at about half past eight, after dust had settled over the small mountain town. We were hungry, but we didn't stop at any of the nearby restaurants, attempting to lure us in with the smells of garlic and sounds of laughter drifting through our open car windows. We were thinking, instead, about roasted franks and hot beans over a small campfire. 

Link to Google Maps: http://g.co/maps/fhgs

It took us another half an hour to find our final destination for the night. We were following directions from a friend, and in true Colorado dialect, the navigation descriptions went something like this: 

Follow Slate Rd about 10-15 min up. You go past the big gorgeous pond, through a couple thickets of aspens surrounding the road, and then there's a relatively unmarked left turn-off down a pretty precarious road (you guys have an SUV, right?) that takes you right down to the river where the campsites are.

Since it was after dark, we felt like we had passed three various ponds and wondered if the trees we were seeing were aspens or birches (or did it matter?) and the only roads turning left were completely unmarked instead of "relatively unmarked." To make a long story short, we took a left turn after spotting most of the reference landmarks only to nearly lose the undercarriage of the car on the "precarious" parts of the dirt road (she wasn't kidding about the SUV). But as luck would have it, we ended up down by the quiet banks of the Slate River. We sat there for a while with the engine still running, staring at the silver stream before us and wondering if we should set up camp here or turn around to continue searching since we were not confident that our location was the same "x" on the map that our friend was referring us to in her directions. We couldn't see other tents or campfires. Glancing at the rocky road that we just descended from in the rear view mirrors, we decided to stay put and call this place home for the night (neither of us wanted to admit our fears that the car wouldn't make the return trip).  

Our nerves quickly dissolved into giddy excitement! We were in the middle of nowhere with nothing but a star-freckled sky over our heads. The air was crisp with the night's chill but we stayed warm as we buzzed around setting up the tent, unloading the car, and hunting for dry kinder for a fire.

Joe and I tag teaming the tent assembly.
This tent was gifted to us at our wedding (such a wonderful gift)
and can be assembled in less than 10 minutes! 

Once we got the fire steadily crackling, we perched ourselves on two river rocks that Joe dragged from the banks and starting heating dinner. I would highly recommend bringing along lighter fluid for "just in case" scenarios, such as random afternoon rain showers that keep wood debris damp well into the evening hours.  We passed Smokey Bear on our way into town holding a sign advertising for "moderate" risk for forest fires. Thank goodness it wasn't "high" since we quickly discovered that lighter fluid soaked pine brush takes flight quite easily in small wind gusts whiles its needles are still glowing with heat. Yikes!

My happy mountain man tending to his first hotdog of the evening.
We decided to open a special bottle of beer that my brother, Michael,
had given us back in July (The Lost Abbey Avant Garde Ale).
We were saving it for a special occasion and couldn't think of a better way
to appreciate a fine brew than our first camping adventure.
A small, foldable grill and extendable skewers make
for a luxurious outdoor dining experience.
A close up of what I call, "Cowboy Cuisine".
We got franks a roastin' (with no added nitrates thank you very much),
bread a toastin' and a fine can a beans a boilin'. 
One of my favorite things: baked beans.
It was even my lucky night because I caught the bacon piece.
I equate that to getting the maraschino cherry in can of cocktail fruit.
Anyone else with me?

After feasting until nearly 11:00 PM, we took the empty beans and beer containers, filled them with river water and drowned our cozy campfire before retreating to our tent for the night. One of the wonderful things about Colorado is that there are no blood-thirsty or light-drunken critters, like mosquitos and june bugs, swarming around your head or your flashlights. It is like camping in the heavens!  There is the risk of bigger animals. For this reason, we stored all food items in the car overnight.

The next morning, we awoke trembling with cold and fighting the cobwebs of sleep. We managed to dissemble camp by about 8:30 AM, by which point we had time to study the hiking trail maps and visually devour our campsite now that the sun was up. It really was beautiful...

View from the car, looking at our tent location across the Slate River.
Looking downstream from our tent's perspective.
We got really lucky both nights with diverted storm clouds.
Lookout for what?
A sign located on Slate Road.

We drove back towards town to get to an intercetion that would lead us north down Gothic Road. This took us into along a route through another small town of Mt. Crested Butte (an appendix settlement of Crested Butte we decided) past Crested Butte Mountain flanked with ski lodging, past rural log-hut communities to a narrow dirt road skirting a large meandering stream with emerald waters. Around 9:30 AM we reached the trailhead for the "401."  The 401 is a mountain biking trail starting from the lowlands between Avery Peak and Gothic Mountain and ending at the Schofield Pass. At 16 miles roundtrip, we figured we could just hike out as far as our legs could carry us, squat for lunch, and then return by mid afternoon. We ended up doing about 10 miles total, a hearty 5-hr hike! During this time we encountered four wooden bridges crossing various streams full of water from mountain snowmelt, birch tree forests, tall grasses mingling with colorful wildflowers. Being late-August, we missed the peak season for the blooms, which occur mid-July, but it was beautiful nonetheless. We stopped frequently for water and photos (such as the following).


Essential food items that we carry in our hiking bag includes, 3-5 liters of water dispersed between a CamelBak and Kleen Kanteens, trail mix, energy bars, chocolate-coated coffee beans, and peanut butter sandwiches. Much of this can be eaten at the onset of mid-trail tummy rumbles, however, we try to make a point to stop for a heartier snack (like our sandwiches) at the turnaround point of trails. For the 401 trail this day, our turnaround point was located on a switchback overlooking the river valley and Mt. Crested Butte. We brought two cans of soup instead of sandwiches, but Joe settled for a Cliff bar and I snacked on warm condensed soup before enduring our returning trek. Needless to say, when we finished, we were hungry and thirsty for some "real" food.

After stopping in the main town of Crested Butte to refill our water supply,
we wandered down the town's main street and stumbled upon a local
brewery, the Eldo, with roof top patio seating.
Two beers, please, for the weary travelers!
"A sunny place for shady people," is what their motto is, haha. 
Fat, starch, and salt become the desire of post-hiking hunger.
These were probably the most memorable cheesy fries I have ever had,
as they were freshly cut, spread thin, and topped with aged cheddar
and pepper jack cheeses until they became one gooey mass of greatness.
This picture was snapped quickly before completely disappearing. 
After spoiling ourselves with food and drink at a modern eatery, it was back to work setting up camp and  fire. After a few more hot dogs and roasted granny smith apples (a Lazar family tradition), we tumbled into a deep slumber for our final night in rustic mountain country. Unfortunately, it was an even colder night than the one before. I woke up with dreams of a large cup of piping hot coffee just out of reach. In addition, both of us felt as if we had just hibernated for months and decided to have a nice meal in town before saying goodbye and returning to Denver. We knew we had found our brunch spot when we spotted a donut rising over the mountains...

Quite the popular place among locals.
The last meal was complete with generous portions of hot coffee, buttered
toast,  homemade potato latkes, eggs and challah bread french toast.
Unfortunately, we were so quick to stuff our faces that this photo came
as an afterthought and only captures the last few bits.
Take my word for it... soul warming. 
Until next time Crested Butte!
Thank you for your mountains, hiking trails, and delicious food.