Tuesday, January 31, 2012

Golden Risotto

Whether or not you like squash, chances are you would adore this rich, golden risotto. With over 200 positive reviews from self-proclaimed Food Network critics, I couldn't resist trying this recipe for myself.  Next to Arborio rice, this risotto calls for roasted butternut squash, parmesan, saffron (giving the dish an added color boost), and a few splashes of white wine. As we continue to endure the winter weather, risotto embodies an ideal one-pot remedy to warming up... from the inside out!


Roasted Butternut Squash. 

For easy squash preparation, I suggest washing your squash, stabbing it with a fork a few times and then microwaving the entire thing for 5-8 minutes. This will make the flesh a bit softer and easier to cut. I prefer to cut it in half, scoop out the seeds, then cut it into 1-inch slices. To cook, brush with olive oil, sprinkle with salt and pepper and roast for 30 minutes. Remove from the oven, remove the peel, and then chop. I prefer this way much better than trying to peel and cube a raw, hard squash! You might save a finger using my method... just sayin' I know my limits as an accident-prone cook!

Now onto risotto bliss. I think it is easier to read visually in this case. Remember, the trick to a creamy risotto is to add your liquid (broth and wine) over time, little by little, waiting for your rice to ask you for more. Be generous with adding parmesan and salt.  The last thing you want is a flavorless pile of rice and squash!  And remember, if you feel like tossing in a few other vegetables or seafood or whatever, well go for it! That is one the beautiful thing about risottos, they allow generous room for culinary creativity.

Variations: Bacon instead of pancetta (I forgot to add
the special Italian bacon to my grocery list... in retrospect,
the flavor was still delicious for a lot less cost).
Another Variation:  I tossed a few mushrooms into the pot. 
Be sure to drink the rest of your opened
bottle of white wine (hopefully you have company).
It pairs so nicely with the finished dish! 
The first of many scoops of hot, sticky Golden Risotto.

Viola!  
You are now warmed and satisfied. 

Sunday, January 29, 2012

Brazen Brussels

Brussels sprouts are such a lovely variety of cruciferous.  I feel as if each petite bud represents a gift wrapped in multiple layers of bright green wrapping. Although named after the capital of Belgium, few historians believe it that the plant originated there. Some believe they were more likely to have been birthed out of ancient Rome, then spread across Europe, and eventually North Americas embraced them, too.  Regardless, I'm just happy when they make an appearance on my dinner plate!  

Brussels sprouts grow off of long, fibrous stalks.
Many farmers markets sell them by the stalk.
I bought them at the grocery store by the pound. 

Put some brussels sprouts on your dinner menu this week! Using the recipe below, your brussels will be ready to eat in about 30 minutes. Such a simple (and nutritious) way to escape the dreaded monotony of side-dish repeats. 

These brussels sprouts pair handsomely with pork chops.


Brazen Brussels Sprouts
Serves 4-6

1/4 cup raisins
1lb brussels sprouts
2 Tbsp. olive oil
1/4 cup finely chopped yellow onion
1 clove of garlic, minced
1 slice bacon (no added nitrates/nitrites)
1 handful (about 3 Tbsps) sliced almonds, toasted
1/2 teaspoon salt
Freshly ground black pepper, to taste
Place raisins in a small bowl and soak with hot water. Meanwhile, prepare brussels sprouts. Wash them, trim the stems from the bottom, and remove outer leaves. Slice each brussels sprout in half and set aside.  Heat sliced almonds over medium heat in a skillet for about 10 minutes, shaking the pan often to prevent burning. Set toasted almonds aside.

Heat olive oil in a large skillet over medium-low heat. Place bacon strip into the oil and let sizzle for about 2 minutes. Add the onions in the skillet and cook for 4-5 minutes, stirring often, until softened and beginning to brown. Add garlic and cook 1 minute more. Add the brussels sprouts, increase heat to medium-high, and cook for about 12 minutes, stirring occasionally. The brussels sprouts should be crisp-tender and browned in spots. Take out the cooked bacon and dice. Add the bacon and toasted almonds to the pan. Then drain the raisins and add to the skillet. Mix everything well and cook, stirring, 3 minutes more, or until mixture is heated through. Season with salt and black pepper to taste.

Wednesday, January 25, 2012

Skiers Delight: The Casserole

What do hungry skiers eat after a long day on the slopes with no energy to cook and a barren condo kitchen?  Frozen pizzas, Taco Bell, and Coors Light definitely fill stomachs in a hurry, but a strong craving for home-cooked food always remains in the hollowest pits.  As Joe and I began making more and more trips out west to ski, I decided to put an end to our preservative-laden noshing habits. The solution? 

The Casserole!

One of my go-to casseroles:
lovely lasagnas!

No wonder these one-dish wonders were so ravenously popular in the past. They can be assembled the night before, baked and stored in the same dish, and contain one very important ingredient: love. Or do I mean cheese?  May I also add that casseroles can be transported without sloshing or spilling... 

"Nesting" your casserole in your lap can
prevent saucy spills in the car.

Casseroles can be baked before a trip departure and microwaved on-demand, or transported "raw" and baked at the final destination.  I usually bake mine the night before as to minimize potential messes. Sometimes this requires nesting a casserole in my lap during the tumultuous journey along I-70 West.  And man, oh man, can the smell of a cooked casserole sure can ignite cravings within the tight confinements of a car! 

As our ski outings became more frequent, our consumption of casseroles did too. Joe and I recently tried a casserole that put all previous noodle-based dishes to shame. Slow-cooked beans and corn-laden cornbread constituted the main ingredients. Something a cowboy's wife might prepare, I imagine (hehe). This lovely dish was called:

Pinto Bean Corn Pone

A vegetarian version to the American classic,  Tamale Pie.

The foundation of this dish, literally, were slow-cooked beans. I prepared my pintos using a crock pot (see recipe below) and then further stewed them with caramelized onions and spices.

Beans, beans, the wonderful fruit!

The beans were poured into the bottom of the casserole dish, then an uncooked cornbread mixture was layered gently on top.  After the bean and corns were allowed to cook slightly, the casserole was removed from the oven and garnished with spicy shredded cheese. With all of my casserole experimentation, I've realized the common denominator... cheese!  After more oven time, a crust-like cheese layer is achieved. And this blanket of golden, crispy cheese is absolutely wonderful.

Contrasting tri-layers of spicy beans, savory cornbread, and
crispy queso crust.  Pinto Bean Corn Pone is skiers' delight.

Consider making a casserole this week.  Whether you are coming home from a long day of work, or returning from a day in the mountains, you too will realize how nice it is to build up an appetite knowing that dinner will be ready whenever you are!

Pinto Bean and Corn Pone
Recipe found on Culinate's website HERE.

Slow-Cooked Pinto Beans
Recipe found on Culinate's website HERE.
Note: I used a crock pot on high heat for 8-10 hours to cook my beans. 


Saturday, January 21, 2012

Winter Marble Cake

Joe and I hosted our first-ever dinner party!  We both reflected on the fact that this meal marked the first time our table was at full capacity, which was not difficult to do since it seats only four.  I decided to prepare a few of my favorite simple Italian dishes that I encountered during my summer Italian cooking challenge. As many hosts strive to do, I wanted to prepare something elegant while at the same time remaining secretly fuss-free.  The menu was as follows:

Simple Potato Salad
Hot rolls
Pumpkin Chocolate Marble Cake

Making hosting look easy.

Besides cooking and cleaning, I needed some additional time to make sure our apartment was baby proof!  As it turns out, babies that crawl are quite the magnets to all electrical outlets and hidden cords. Even after we taped up cords and scattered toys across the carpet, the four adults took rotating shifts chasing around our animated 1-year old visitor, Levi. It wasn't until dessert when we could all finally remain at the table without worry. This was because Levi suddenly fell captivated by an unsuspecting baby decoy:  the large plastic lid of my cake Tupperware!  We could barely stomach our cake without spitting into giggles as we all observed him push the lid across the carpet, poke at it, attempt to make it roll or simply be in its company. In a way, this dessert truly succeeded in slicing up smiles, as well as compliments!  


Chocolate Pumpkin Marble Cake:
a guaranteed crowd pleaser!

The true chef deserving of praise for this bi-flavor pound cake is my mother. She baked this cake as a festive Christmas dessert when Joe and I were in Minnesota this past holiday season. She passed the recipe onto me and the rest is history!  Winter seems to be gaining strength in much of the Midwest. If you want to bring warm smiles to your dinner table for two or many, I highly recommend this as a final course.  Below I am sharing a modified version of the recipe that I consider to be far better than the original. I substituted fresh pumpkin for canned. If you do so as well, I recommend simmering your fresh pumpkin puree over low heat for about an hour to thicken. And, of course, try my mother's famously elegant (but secretly simple) rich chocolate glaze.  


Chocolate Pumpkin Marble Cake 
Adapted from "My Recipes" website

1 1/2 cups butter, room temperature
3 cups sugar
6 eggs
2 teaspoons vanilla
1 1/4 cups canned pumpkin (or cooked fresh shown below)
2 3/4 cups all-purpose flour (substituting 1 3/4 cups for whole wheat, optional)
2 teaspoons baking powder
1 teaspoon salt
1 teaspoon ground cinnamon
1/2 teaspoon nutmeg
3/4 cup unsweentened cocoa powder
1 cup milk, whole preferred

  1. In a large bowl, with a mixer on medium speed, beat butter and sugar until well blended. Add eggs, one at a time, beating well after each addition. Beat in vanilla. Scrape half the mixture into another bowl.
  2. To make pumpkin batter: Beat pumpkin into half the butter mixture until well blended. In another bowl, stir together 1 3/4 cups flour (whole wheat if using), 1 teaspoon baking powder, 1/2 teaspoon salt, cinnamon, nutmeg, and cloves. Add flour mixture to pumpkin mixture and beat on low speed or fold in with a flexible spatula just until blended.
  3. To make chocolate batter: In another bowl, mix remaining 1 cup flour, 1 teaspoon baking powder, 1/2 teaspoon salt, and the cocoa. Add flour mixture alternately with the buttermilk to the other half of the butter mixture (starting and ending with flour mixture), beating after each addition just until blended.
  4. Spoon half the pumpkin batter into a buttered and floured 12-cup bundt-cake pan. Drop half the chocolate batter by spoonfuls over (but not entirely covering) the pumpkin batter. Repeat to spoon remaining pumpkin and chocolate batters into pan. Gently run the blade of a butter knife around the center of the pan several times, then draw the knife across the width of the pan in 10 to 12 places to swirl batters.  See pictures below!
  5. Bake in a 350° until a wood skewer/toothpick inserted into center of cake comes out with a few moist crumbs attached, 55 to 60 minutes. Let cake cool 10 minutes in pan, then invert onto a rack, lift off pan, and cool cake completely.  Pour warm chocolate glaze (recipe below) over the top of the cake, letting it drip down the sides. 

Marvelous marbling!


Easy Chocolate Glaze 
Connie Nuss (my mother)

3 Tbsp. butter
3 Tbsp. corn syrup
3 Tbso. semi sweet chocolate

Place chocolate into a microwave safe bowl and heat until melted (30 seconds, stir, 30 seconds, repeat). Stir in the corn syrup and butter until well mixed and smooth (add additional 30 second sessions of cook time as needed).  Pour over desired cake or dessert while hot. 

Wednesday, January 18, 2012

Blizzard BBQ

Colorado is about to get hit by a massive winter storm that is predicted to tear through Vail Pass and Summit Valley over the next two days. With snow and wind gusts over 100 miles per hour (really!), I feel lucky to be in Denver where the weather will remain in the 50's and snowless. Nevertheless, Colorado has been in dire need of snow so I decided to celebrate the storm by firin' up my trusty crock pot for some winter-worthy, slow-cooked Bar-B-Que.  Steadfast cravings of my inner cowgirl... 

Witchita Falls, Texas.
Second grade (me), ready for the rodeo.
Slow-Cooked BBQ Pulled Pork,
(sandwich style).

Never before did I realize that pulled pork (a true favorite of mine) was so easy to prepare at home, and on a busy weeknight at that!  This recipe required only THREE ingredients with minimal prep. Simply place a pork roast in your handy dandy crock pot. Shake salt and pepper generously over the top and cover with the lid. Let it cook away while you are at work and when you return home from your busy day, your pork roast will be tender and falling off the bone.


Shred, shred, shred!


Pour on your favorite BBQ sauce to taste. 

My absolute favorite sauce in the world.
Must purchase within Kansas state boarders
or off of some other schmuck that's selling
bottle for profit (like me)!

Leave your spurs by the door and dish up a generous serving of pork over a few slices of white Texas Toast or Wonder Bread to soak up all of the saucy juices (we used buttered, crusty sourdough for lack of the others).  

Yeehaw!


Slow-Cooked Pulled Pork 
Serves 4

3 lbs. pork roast
Salt and pepper
Your favorite BBQ sauce

Place pork roast into crock pot with fattiest side up. Season well with salt and pepper. Place lid on top and cook on low heat setting for 8-10 hours, or high heat setting for 5-6 hours. Try not to remove the lid (it will release all of the heat and extend your cooking time). When meat is falling off of the bone and cooked through, shred, then mix in BBQ sauce to your liking. Serve with white bread and coleslaw. 


Monday, January 16, 2012

Slovakian Halushky Dumplings with Bryndza

Introducing Bryndza...


This little block of traditional Eastern European sheep's milk cheese traveled from Slovakia to Wisconsin to Colorado where it was finally consumed!  (I know what you're thinking and don't worry. It has been in the freezer the entire time to keep it fresh).   I cannot believe how long it has taken me to finally glorify this unique cheese. But, I have been waiting for the right time. A time when I could make a specific Slovakian dish. A dish that goes back generations. A dish called, Halushky with Bryndza.  

Halusky with Bryndza,
a Slovakian favorite!

I have eaten this dish only once before, at the dinner table of Joe's family. That was nearly five years ago, back when Joe and I were only college sweethearts. Around that time I remember thinking that Joe had this peculiar cheese shredder in his apartment kitchen that was never used. Turns out, five years later, I have finally figured out the tool's true identity. It wasn't a cheese shredder, but a European dumpling sieve!  An essential tool for making Halusky dumplings!  

I referenced my Slovakian cookbook for my Haluski recipe, but half way through my dumpling preparation I decided to call Joe's mother for a cooking consultation! I couldn't have made this dish without her, and have included her advice in the recipe below.  

This dish starts off with the making of basic Haluski dumplings made of starch, flour, egg, and salt. For this particular recipe, I used potatoes as my starch, but flour is much faster and easier to use.  My handy dandy food processor made the potato preparation very effortless... 


After the potatoes where peeled, shredded and pureed, a dough was made by adding flour, egg and salt and mixing well. A lumpy, thick dough was formed. I would say it was about the consistency of runny oatmeal. This consistency is very important. Not too thick or too runny. In other words, it should be able to easily fall through the holes in the dumpling sieve via gravity and not force. 


Once you have your starchy dough, bring some salted water to a boil. This is where the special dumpling sieve comes into play. Balance it over the top of your boiling water pot with the dough slider on top. This is what it looks like:


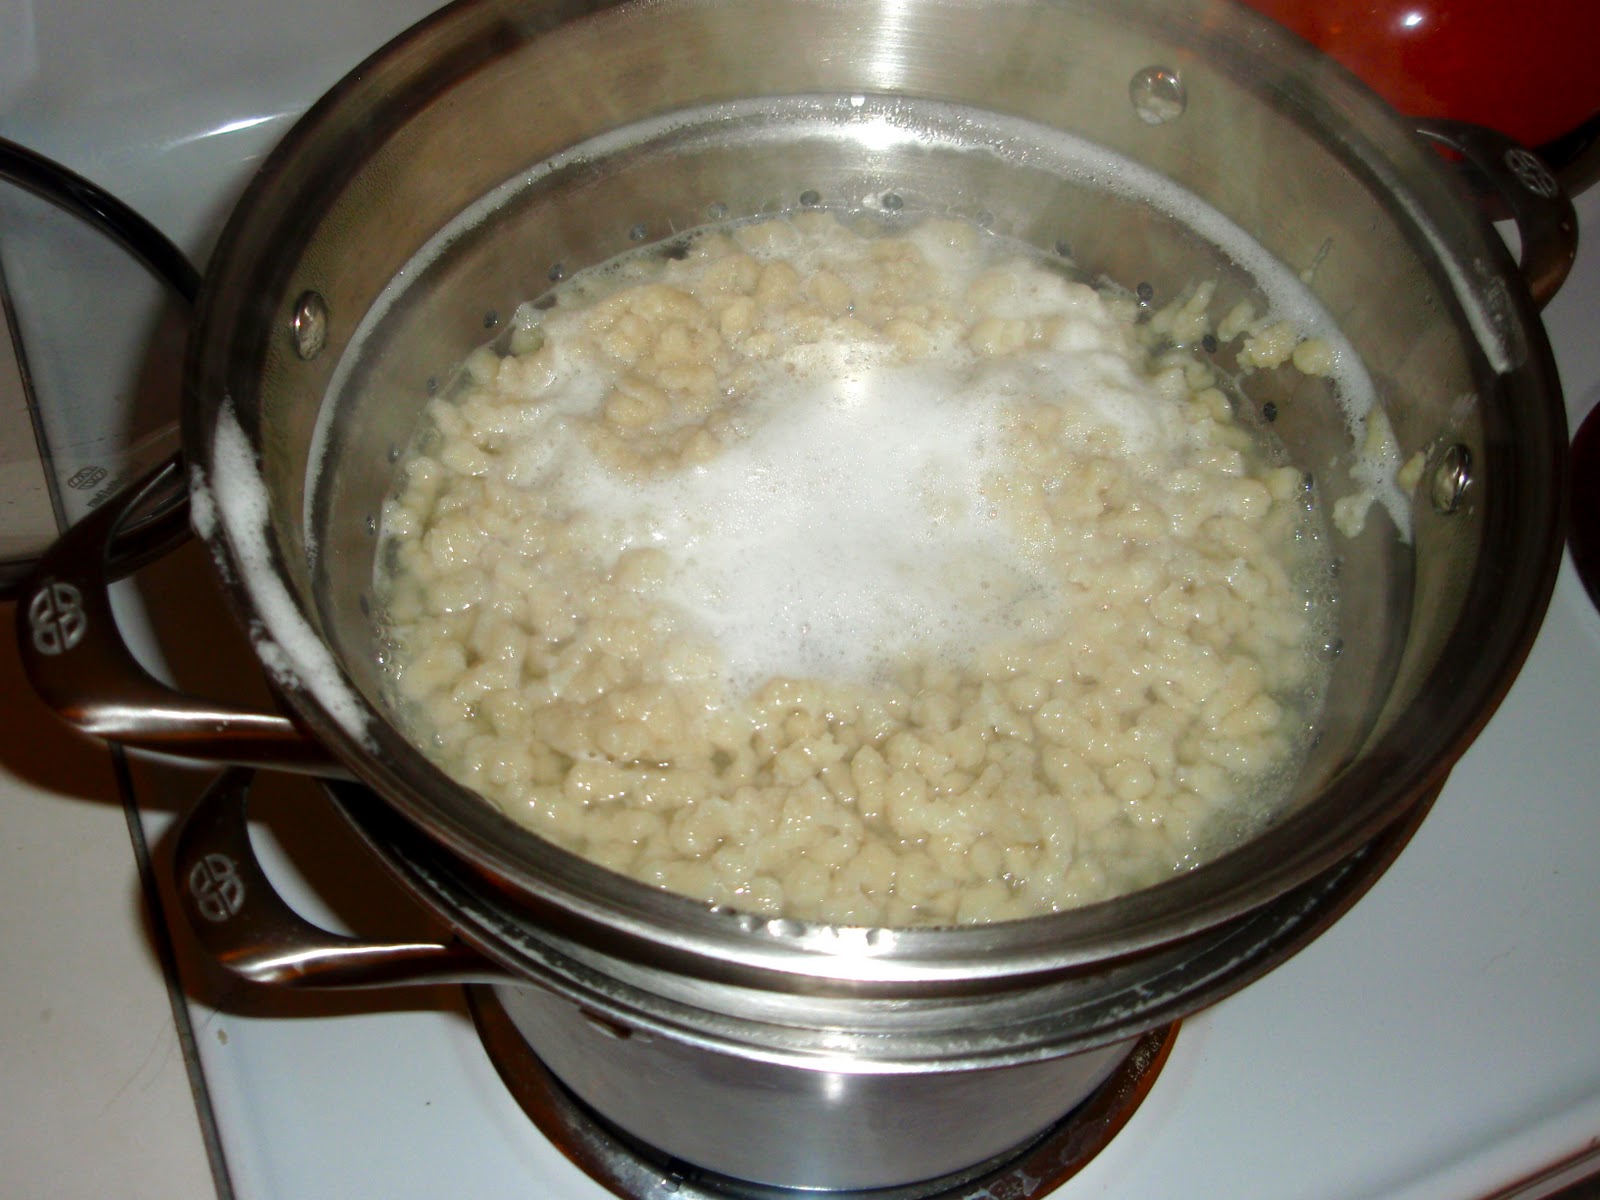
Now pour your dough into the sliding box and glide the box back and forth to get the dough to drop through the holes into the boiling water. Once all of the dough is added, let the dumplings boil until they float to the surface of the water. Then let them boil an additional few minutes before draining and rinsing with water. 

Plain Haluski Dumplings!

Now comes the fun part! Mix up the some Bryndza cheese with a bit of sour cream to get it smooth and creamy. Cream cheese can be substituted for Bryndza if you don't happen to know someone who makes regular trips to Slovakia (hehe).  Stir the cheese mixture into the hot dumplings. Then, fry up some bacon in a pan. Remove the bacon and crumble it. To serve, top each helping of cheesy Haluski with a hearty helping of bacon pieces and sliced green onions.  Finally, drizzle with some reserved, hot bacon grease and many shakes of salt... oh, yes, those toppings are required!   This dish is guaranteed to be the most memorable, hearty plate of European comfort food you'll ever encounter!

Haluski with Bryndza is traditionally served with
buttermilk, whole milk (shown here), or plum brandy. 

Slovakian Halushky Dumplings with Bryndza 
From "Slovak Cuisine" cookbook
Serves 8

5 russet potatoes, washed and peeled
1 cup all-purpose flour
1 egg
200 g block Bryndza cheese, or 4 oz (1/2 block) full-fat cream cheese
1/4 to 1/2 cup sour cream
5 strips of bacon, cooked and crumbled (grease reserved), for garnish
Green onions, sliced, for garnish
Salt to taste

Using a food processor, shred and puree potatoes. Put potatoes into a large bowl, then mix in flour, egg, and about 1 tablespoon salt. This dough should be about the consistency of runny oatmeal. Bring salted water to boil in a large pot. Using a special European dumpling colander, pour the dough into the slider to drop dumplings into the hot water to cook. Dumplings should rise to the surface of the water once they are cooked. After they begin to float, let them cook an additional 3-5 minutes before draining and rinsing under running water. Place dumplings into a large bowl.  Now, prepare the cheese mixture by mixing Bryndza (or cream cheese) and sour cream. Stir the cheese mixture into the hot dumplings. Fry up the bacon in a large frying pan until crispy. Remove the bacon and crumble, making sure to reserve the grease.  To serve, place cheesy dumplings on a plate, add crumbled bacon, green onions, and a drizzle of bacon grease. Sprinkle generously with salt. Best when eaten immediately!
Note: If you don't have this special colander, use a knife and a cutting board to toss the pieces in. 

Saturday, January 7, 2012

Linger

Having friends from far away places come to visit makes me all warm and fuzzy inside.  Our most recent congenial visitor was Bob, from Madison, Wisconsin.  Being one of Joe's good friends from Medical School, we wanted to show him around our new city. One of our stops included an adventurous dinner at a trendy eatery in the Denver Highlands neighborhood. I guess you could say we literally "Linger-ed"with great company and multiple small plates of international, gourmet street food. 


We ordered plate, after plate, after plate of intriguing dishes off of their menu. My favorite were the Strongbow Cider Steamed Mussels! 


Then, stuffed ourselves silly...


We were so filled with food by the end of the night that we couldn't even find extra room for Little Man's Ice Cream, which is located just next door (in the picture above to the left).  Nevertheless, we left full of memories.